I’d like a C function that when called clearly demonstrates which gets parsed first: comments or preprocessor directives.

Do Not Fire Your Good Programmers Just Yet
2026-05-23 10:04
Being a programmer these days is like being a portrait painter in 1860 — clearly the profession is changing a bit.

A common trope of mainstream media wonders if AI will replace programmers. The answer is: it’s complicated. Modern LLMs have been able to impress just about everybody with some amazing tricks at least some of the time. Just to highlight that I’m fully aware of how LLMs can sometimes be insanely competent I thought I’d try to get a very flashy demo of them doing a very good job. I came up with the idea of a C program that simulates a bouncing ball. In less than a couple of minutes from thinking of the request, my normal LLM had instantly produced code that compiled with no problems and was able to produce this.
That’s just astonishingly competent. Capturing the GIF took way more time than creating this program ex nihilo! So good programmers definitely understand that there is a lot of potential here and AI coding can not be dismissed as incompetent.
But those of us who take more than just a casual interest in software usually have some other, less flattering, data points. Today’s adventure is not a typical AI fail story where I ask for a thing and get a simple mess. That’s easy to produce. What I came across was a programming problem that is what I would consider to be easy.
My programming request was so easy that I was actually able to open my editor, type in an extemporaneous C program in one shot, have it compile, run without errors, and function effectively. Since it was so easy for me I thought to expand the scope a bit and see what possibly better strategy my robot friends would come up with. Wow. I was quite unprepared for the massive incompetence!
I know you’re not interested in esoteric C programming details but I think superficially understanding this problem can help one understand the kinds of trouble AI can get into. Robotic readers may recall that I take a special interest in complicated parsing conundrums. This excellent Dan Piraro cartoon best explains what that means.

Another good example is the "roger, Roger" scene from the movie Airplane.
I am currently writing a specialized C parser and I have to think about some similar issues. The specifics are unimportant so feel free to ignore them. In fact, it’s safe to ignore all the code in this post!
Here is the original prompt I gave.
This led to so much nonsense that I had to clarify a bit. Here is the less demanding prompt I used in my tests.
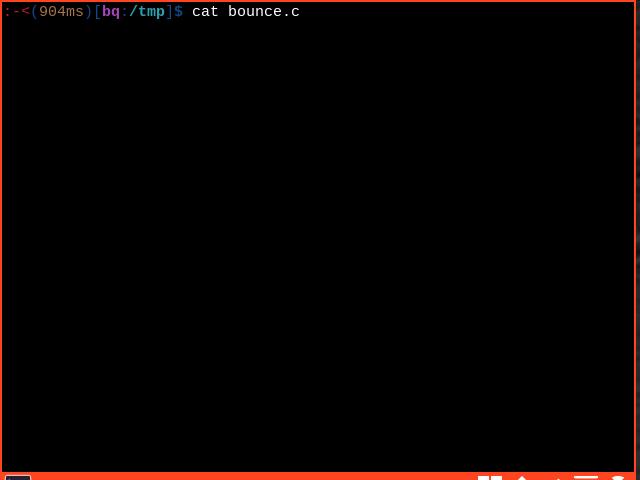
I have two custom research C compilers. One of them parses preprocessor directives first and then handles comments. The other handles the comments and then deploys the preprocessor directives. Can you write a short program that can tell which is which?
Xed
Here is the "natural" intelligence solution that I came up with in less than 5 minutes. It seems to work.
#include <stdio.h>
#define AFTER //", no wait, before"
int main(int argc, char* argv) {
    printf("Pre-processor processed after" AFTER " comments!\n");
    return 0;
}
Mistral
This is my main robot chat friend that I use for a variety of quality of life reasons unrelated to the most insightful output possible. It is the one that instantly produced the bouncing ball demo. Recently it has had an update which shows its "internal dialog" as it passes ideas back and forth to itself. An interesting approach. Normally there are between zero and a couple of such exchanges. For this program, there were 19.
It then took 44 seconds to produce this (which normal people can safely ignore).
#include <stdio.h>

/*
 * Preprocessor directives are processed first.
 * A '#' inside a comment is not recognized as a directive.
 */

// #define IGNORED 42
#define USED 100

int main() {
    printf("%d\n", USED);
    return 0;
}
This is an amazingly hard fail. You can tell it’s trying to do a similar strategy to my code but it has totally bungled it. It bungled the main logic. It bungled the fact that preprocessor directives can only be preceded by whitespace.
After much prompting and pages and pages of muddle, the best I got it to do was this code that will throw an error in one case and run in the other. I’m unimpressed with the formatting choice too.
/*
#define x 1
*/int main(){return x;}
Perplexity
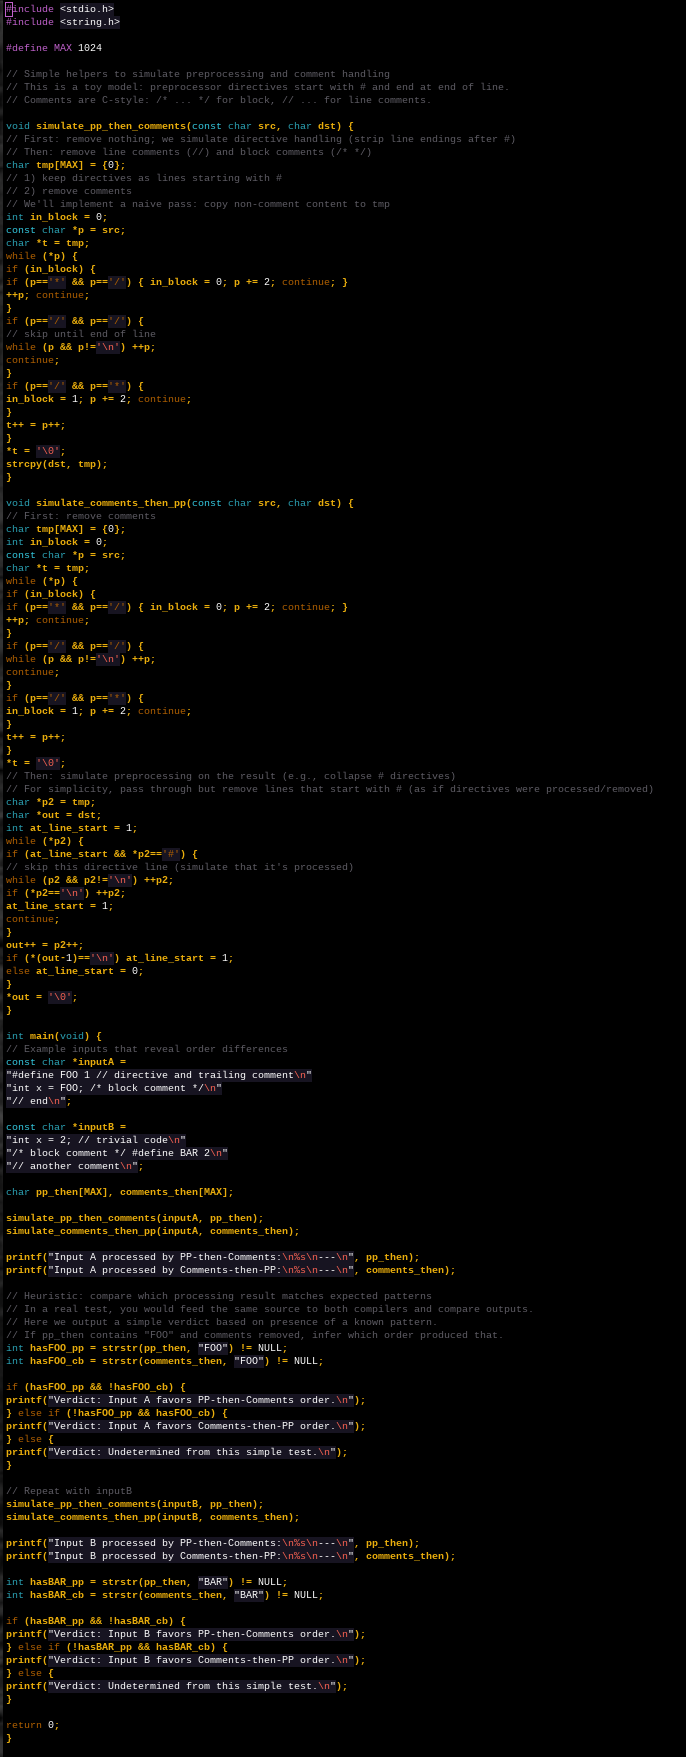
This one was absolutely bonkers!
It decided the best way to solve the problem was to…
Run a lightweight “simulation” of each stage and compare results… It is not a full C parser—just a minimal differentiator you can integrate with your actual compilers as a test harness.
What? That is just insane. I’m not sure if this approach is merely a terrible over-complication or actually fully brain dead but it clearly missed the target and then doubled down.
What’s even crazier is that it clearly senses I want a minimal solution.
I can help with a small program that distinguishes the two compiler orders… Note: Since you’re asking for a short program, this example focuses on illustrating the concept with simple, deterministic behavior…
And then it proceeds to produce this insane (terribly formatted) program. No need to read it, I’m just showing an overview image of the whole thing to give you an idea of what it thought was "simple".
Euria
This is a Swiss bot from my domain registrar that is scrambling to try to provide Euro folks with a non-American AI alternative. I find that it is usually pretty good in many ways and I often turn to it when I want a second opinion — a better one.
This one didn’t strain to think of a solution — this popped out immediately.
/*
 * The following line looks like a preprocessor directive but is
 * inside a multi-line comment.
 *
 * #define FAKE_DIRECTIVE 1
 */

int main(void) {
    #ifdef FAKE_DIRECTIVE
        return 0; /* Compiler A: Preprocessor runs first -> sees #define -> defines FAKE_DIRECTIVE */
    #else
        return 1; /* Compiler B: Comments removed first -> #define ignored -> FAKE_DIRECTIVE undefined */
    #endif
}
Not bad. Seems close and on the right path but I spot an immediate error…
The problem with this is that we know the C preprocessor system will never look at the commented version because it needs to have only whitespace (or nothing) between the start of the line and the # that signals the directive.
It then started rambling for pages and pages coming up with five different versions of essentially this
int main(void) {
    /* #define TEST 1 */
    #ifdef TEST
        return 1; /* Compiler A: Preprocessor runs first -> sees #define inside comment -> TEST defined -> returns 1 */
    #else
        return 0; /* Compiler B: Comments removed first -> #define ignored -> TEST undefined -> returns 0 */
    #endif
}
Note that my objection still stands! What’s really crazy is that it
was so close the first time. All it would have needed to do was just
pull those decorative * characters from the comment! Indeed for a
problem like this it could be considered helpful even if I had to make
minor adjustments myself.
Claude
It starts out with this which I think is quite close. But check out that comment styling!
//* This line is a comment in C++ style, but what about the slash before it?
#define MSG "Preprocessor ran FIRST (comments second)"
//*/
#define MSG "Comments ran FIRST (preprocessor second)"

#include <stdio.h>

int main(void) {
    puts(MSG);
    return 0;
}
WTF is that? If it just did normal C comments (/* like this */) then
I think it would have worked. But as is, the double // style
comments just leave the first define as always present. But it doesn’t
even matter because the MSG value will always get redefined.
It walks through this code — still without me prompting a follow up — and then thinks better of it.
Wait — let me think through this more carefully and give you a cleaner, more reliable trick…
This time it uses regular C comments but still defines the commented version before the uncommented one meaning it will never work either.
It rambles a bit more about that code without addressing the aforementioned problem — again without me putting in any new prompting — and again thinks better of it!
Actually, a #define redefining without #undef is typically a warning/error. Here’s the cleanest version:
Finally on the fourth attempt it creates code that I think looks reasonably sensible.
#include <stdio.h>

/*
#define WHICH 1
*/

#ifndef WHICH
#define WHICH 2
#endif

int main(void) {
    if (WHICH == 1)
        puts("Preprocessor ran first (comments were still present during macro pass)");
    else
        puts("Comments ran first (comment block was gone before macro pass)");
    return 0;
}
If it just spit out that final program and no muddled versions or pages of muddled explanations, we’d have a clear winner. But no, it really struggled to come up with something. And that is what I find so fascinating.
ChatGPT
Early on in LLM history I used to pay for ChatGPT. But I’m poor and don’t have a good ROI for that now. Even still, their free service was by far the most competent of the bots I tried. The OG LLM immediately generated this sensible code with a sensible strategy and no glaring errors. There was no muddled or even extraneous explanations.
#include <stdio.h>

/*
#define MSG "preprocessor-runs-before-comments"
*/

#ifndef MSG
#define MSG "comments-run-before-preprocessor"
#endif

int main(void) {
    puts(MSG);
    return 0;
}
If I were only using ChatGPT, I may not have noticed what a challenge this request seems to be for bots. Good job ChatGPT.
Concluding Lessons
What can we learn from this? Clearly LLM code generation and even problem solving and reasoning is very strong. It is better than humans a lot of the time. Why did this particular problem vex bots more than me? I have a few suspicions.
First, I think this is a very weird request. The fact is that it is difficult to conceive of software that is not mostly like a lot of software that has already existed for a long time. But who asks for some weird thing about the compiler itself? The people writing the compilers are obviously experts who don’t have to do this kind of check. I would push back here and defend the program as not merely interesting as a thorn for robots to step on. It is actually a useful program for teaching C and I could imagine using it in a class demonstration. So the program has a valid purpose, but it is unusually unrepresented in online examples.
The second aspect of this problem that might have been more challenging to a bot than a human is its meta quality. Just like the Piraro cartoon, we humans can quickly use language to understand problems like this but LLMs no. Formal theorem provers and weird structured software can go to arbitrarily high dimensions but I think LLMs suffer when the words are not really the words in a straight forward way. It sees words and wants to act, not think. What is extremely interesting as a reflection of our species is that is usually enough.
Local AI News 2
2026-05-13 21:10
Nearly two years ago I had a Local AI News post where I explored a local instance of modern AI magic. In that case I was weirdly able to get a locally hosted system that generated images with no corporate entanglements or network interaction at all.
Here is a nice example of Geralt of Rivia walking his dog at the mall.

I say weirdly because I would have thought it would have been easier to get a simple chatbot working before image generation. But maybe it’s not so simple.
Today I was working on a C project and I needed some difficult-to-parse example C code. I immediately thought of The International Obfuscated C Code Contest. Here is its Wikipedia entry. The IOCCC is simply wonderful! I spent much of the day being delighted by the latest entries. Seriously, it restored my faith that computer programming is something that smart people sometimes do.
The one entry that stood out and prompted this post was an astonishing complete implementation of a modern LLM chatbot in only 1752 bytes. It is by British-American nerd Adrian Cable. Here is the project’s official contest webpage.
Obviously this is not including the trained model. It is however all the software necessary to negotiate with a local instance of a trained model to effect a passable chatbot. It’s quite incredible really.
Here is an image of what this program’s C source code looks like in my editor.
It’s kind of a shame this is the obfuscated version of this project, but fear not! The prototype is a project by — who else? — Karpathy which you can find here. Looking at Karpathy’s 1000 line version (here) you can really appreciate Adrian’s impressive talent — and Andrej’s of course.
Here are some impressive words about the project from the contest entry.
ChatIOCCC is the world's smallest LLM (large language model) inference
engine - a "generative AI chatbot" in plain-speak. ChatIOCCC runs a
modern open-source model (Meta's LLaMA 2 with 7 billion parameters)
and has a good knowledge of the world, can understand and speak
multiple languages, write code, and many other things. Aside from the
model weights, it has no external dependencies and will run on any
64-bit platform with enough RAM.

LLM inference engines are extremely complex, incorporating a tokenizer
(SentencePiece or byte-pair encoding), embedding layer, transformer
layers (including multi-head self-attention, feed-forward neural
network, activation, layer norm and residual connections), key/value
caching for performance, output projection, decoding, and a state
machine to control the data flow. Implementing all of that machinery,
with no external dependencies, generally takes thousands or tens of
thousands of lines of code. ChatIOCCC is a full LLM implementation in
under 1800 bytes of C, and even supports UTF-8/Unicode input and
output and parallel processing over multiple CPU cores via OpenMP.
The trained model is Meta’s open source llama2-7b-chat model.
The author provides a helpful script to painlessly acquire it and on
my Linux system it clocked in at 6.7GB, about the size of a modest
Steam game.
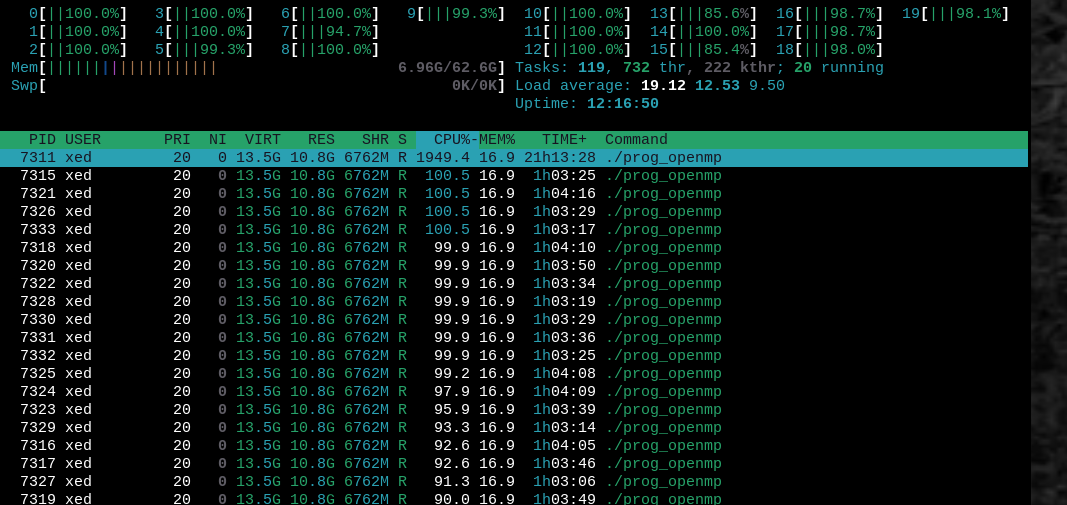
Once I had the model downloaded, the program compiled in the simple way good C programs do — specifically in 214ms in this case. There are some fun overlays, but since I was after a normal chatbot, I focused on that.
One of the most interesting things about playing with a local model is you can get a much better feel for what people are talking about when they say LLMs need a lot of power. When the program was running and generating answers, it would light up all 20 of my CPU cores to 100% the entire time.
Let’s dive into some examples!
The following fairly anodyne program took 3 minutes to generate. So you can see, that is a lot of processing power. Though maybe less processing power than my meat brain would require.
Trial By Fire
2026-04-13 19:33
Here is what the top of my chimney looked like when it was brand new just after I installed it last fall.

And here is what it looked like after just one use.

How is that possible? Well, the new wood stove was lit with a single spark on 2025-10-24. That fire burned uninterrupted for 171 days (= 5 months and 20 days) until last night when I finally let it burn out completely. I’m still using it, but now I will just let it go out at night and relight it in the mornings.
I am extremely pleased that the chimney did not collapse during the several blizzards with 50mph+ winds and sudden feet of snow. I was pretty sure that my design would not fail but during many nights of high winds I was mentally preparing for a huge chunk of the house to detach.
Just feeding this thing dozens of trees over the last half a year has been a huge project. Hell, just clearing snow off of the wood every day was almost a full time job.
One thing we didn’t have to feed was the propane tank. Last winter we filled it three times; this year zero. We last filled it in September and will get at least another month out of it. Probably a good time to stop using that commodity anyway.
I wish I could say that it was cozy and comfortable in the house all winter, but it was not. It was often quite cold and harsh. What I can say is that it was infinitely more cozy and comfortable than it was the previous year without the stove.

Von Neumann Prompts
2026-03-28 08:15
Ever since we got computers to whisper sweet nothings to us, LLMs have turned the sinusoidal hype cycle hill into a hype mesa where maximum hype is going to gobble up all VC money for the foreseeable future. Which is fine. Those nothings are sweet!
But when I sit back and watch the Silicon Valley frenzy to use AI to move up the org chart from feudal lord to god emperor, I sometimes wonder if we’re forgetting fundamentals.
Bruce Schneier is one of the world’s most respected security experts and I’ve read his blog for decades now. I was just reading an article he contributed to called The Promptware Kill Chain and it is mostly sensible stuff.
However, this jumped out at me.
The fundamental issue lies in the architecture of LLMs themselves. Unlike traditional computing systems that strictly separate executable code from user data, LLMs process all input—whether it is a system command, a user’s email, or a retrieved document—as a single, undifferentiated sequence of tokens. There is no architectural boundary to enforce a distinction between trusted instructions and untrusted data. Consequently, a malicious instruction embedded in a seemingly harmless document is processed with the same authority as a system command.
For the 25 years I’ve been a qualified computer security scapegoat, the main threat in "traditional computing systems" has been exactly that strictly separating executable code from user data is fucking hard!
To me, the most salient property of a Von Neumann architecture is:
Memory that stores data and instructions
What kind of common practical computing device uses a Von Neumann architecture? All of them!
The OG computer security exploit is surely the buffer overflow writing "data" into executable memory. This most excellent feature is one of the primary reasons people are afraid of programming in C.
One of the most famous XKCD comics of all time is this illustration of the concept manifesting in SQL.

How are the authors of this article about LLMs making a contrast when the similarity is so fundamental?
Oh well, what do I know? Let’s leave it to the "experts". For now, feel free to have fun with prompt injections, which it appears will plague LLM development for the foreseeable future.
Spring Skate Skiing On Wild Snow
2026-03-25 19:52
When you have a proper winter (i.e. snow is on the ground for more than three weeks leading to a spring thaw) it is common for some of the best skiing to come at the tail end of it. The reason is that at the beginning, the snow is light and fluffy and possibly deep. Skiing through that can be quite a hard slog. However, after some maple syrup weather (i.e. below freezing at night and above during the day), snow on the ground starts to change. It settles and compacts as the sharp edges of the crystals are replaced with smoother melt water re-ice holding things together. At some point it may become possible to ski on top of the snow.
Here in the central UP we are finally arriving at that point. This has been such a crazy year with not only a lot of snow falling out of the sky but with also the more important snow related weather that I always stress is essential for a proper winter: cold temperatures. We’ve had meters of snow and more importantly for what’s on the ground, very little above freezing air temperatures the entire winter. But in the last week we’ve been getting some warm sunny afternoons and finally the snow is starting to get baked down into something usable.
Yesterday I tried to take some video of me exploring it but it’s harder to get acceptable video than it is to ski 10km. Apparently. Today I had another go at it and this time I think I have a video that shows quite a bit about how the landscape is here and what our winter has been like.
During these rare days, my ability to get around the forest with this kind of snow present is unmatched. To see what that looks like and really what my winter has been like generally, check it out.
I’m still working out how to film this stuff and it’s not easy. Today I learned that my mission of scouting out trails was a bad one to film because I was looking around a lot. If you think minutes 25 to 36 will make you motion sick — like they did to me — sorry about that. Just skip that part. But where I’m actually moving on clear snow it should be fine. The Gopro stabilization is actually pretty impressive.
For older posts and RSS feed see the blog archives.
Chris X Edwards © 1999-2026