I apologize of for the title pun, but I felt we needed to get that out of the way as quickly as possible. Take a moment to collect yourself. Once you’re done snickering at that inevitable and amusing linguistic coincidence we can flush the figurative and move on to the literal.
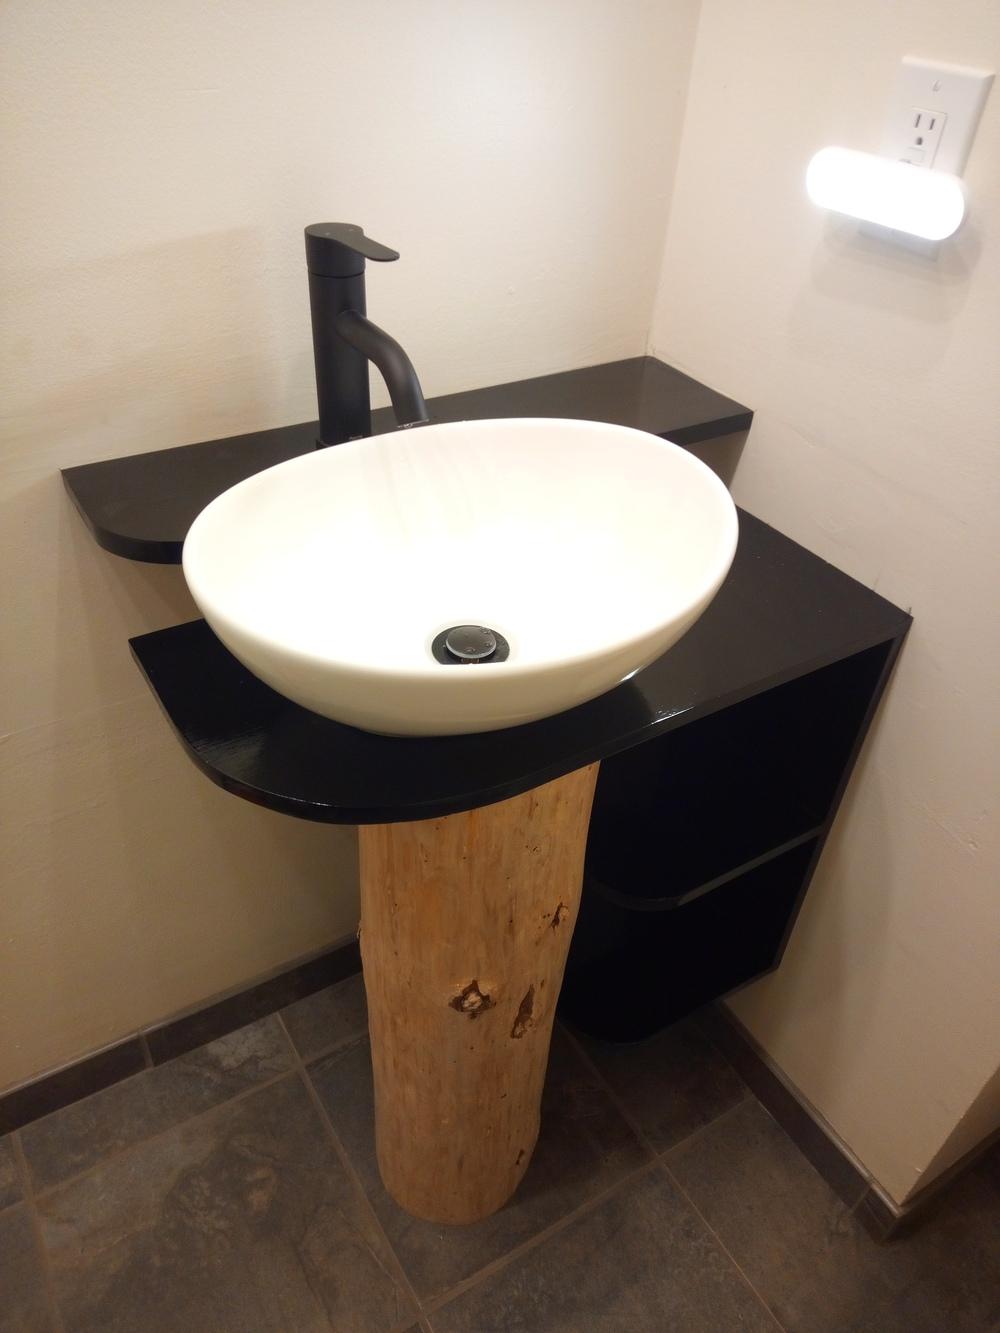
A couple of years ago I was outside cutting firewood and a crazy thought came into my head: this pine log is really a fine piece of solid wood and I wonder if it could be used as the pedestal for the sink I need to install in my downstairs bathroom. The log seemed solid and straight so I set it aside to season.
Fast forward ~18 months and I finally have some time to work on that project. The answer turns out to be yes, it can work! And here it is.
If "Chris installed a sink" is all you need to know, stop reading now. However, many people I know will appreciate nerdy details about its design and construction. The rest of this post is for them!
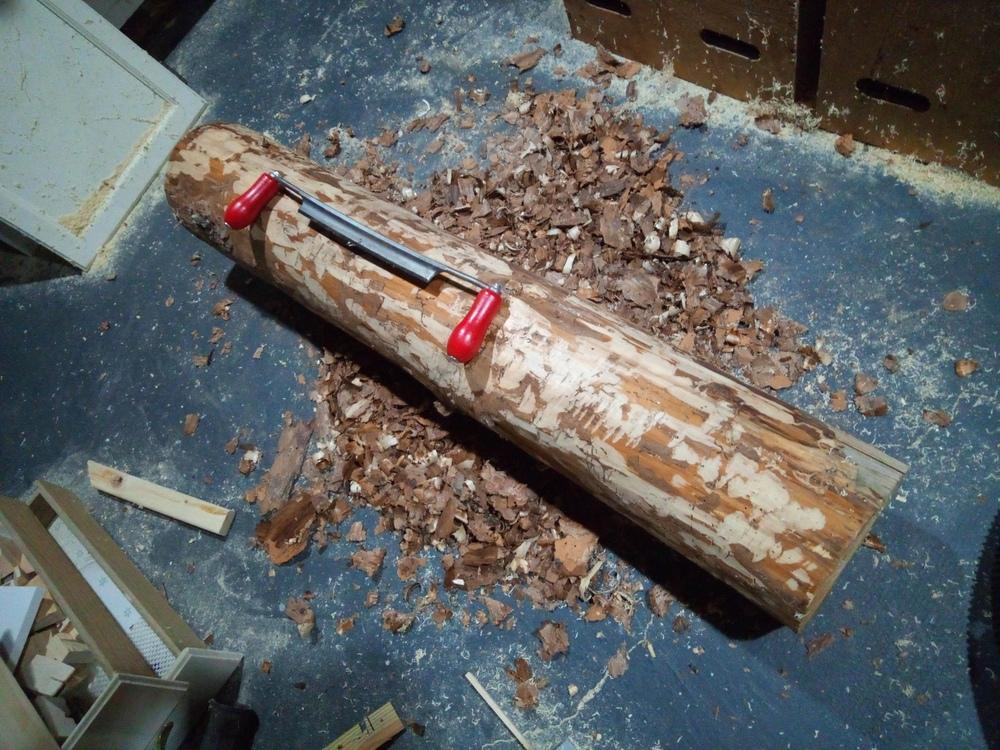
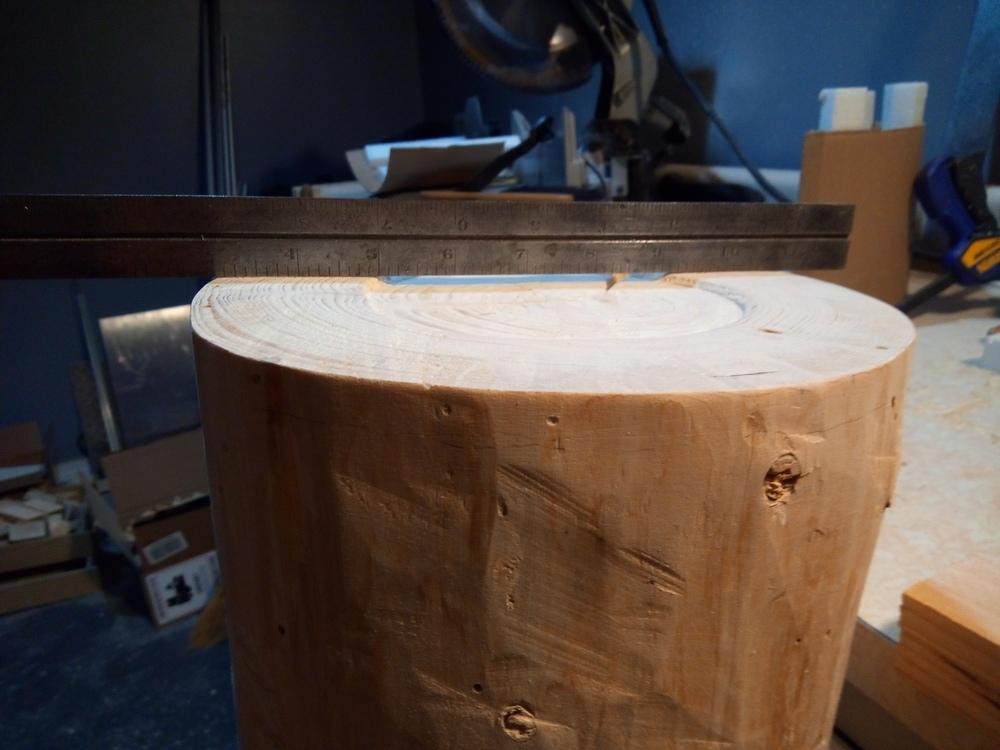
This log was cut in 2019 from a tree that grew within sight of my house. I counted 37 rings which presumably means it was planted in 1982. I think it’s kind of cool to have a piece of the local forest memorialized in my interior space.
First I had to prepare the log by stripping the bark. I used an insanely nice Stubai drawknife from Austria to do that job. Seriously, this is one fine cutting tool!
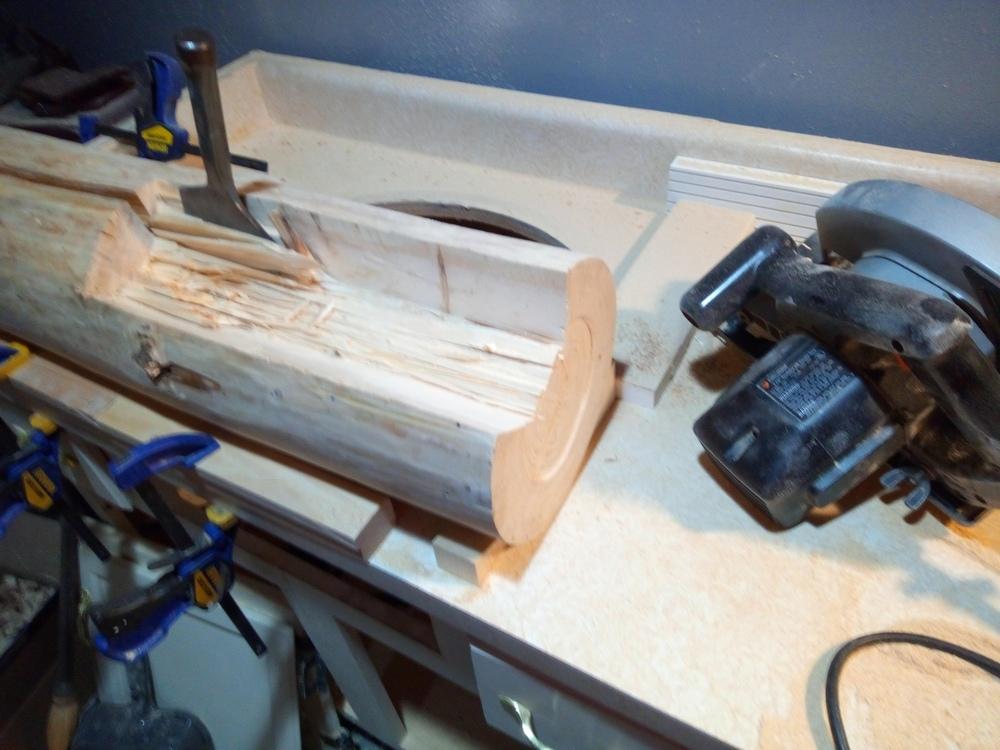
This project was far more complicated than I expected. (Which, by the way, would make a good title for my biography.) Take the "simple" matter of crosscutting the log — this turned out to not be simple at all. How do you line up such a cut? What exactly constitutes the long axis of this quasi-cylindrical block of wood? If it still seems obvious to you, consider a log that captures a 30 degree bend — how exactly would you cut it to length such that its faces were parallel? Just because the imperfections of the log were closer to a 3 degree bend didn’t eliminate the quandary when trying to get things perfectly lined up.
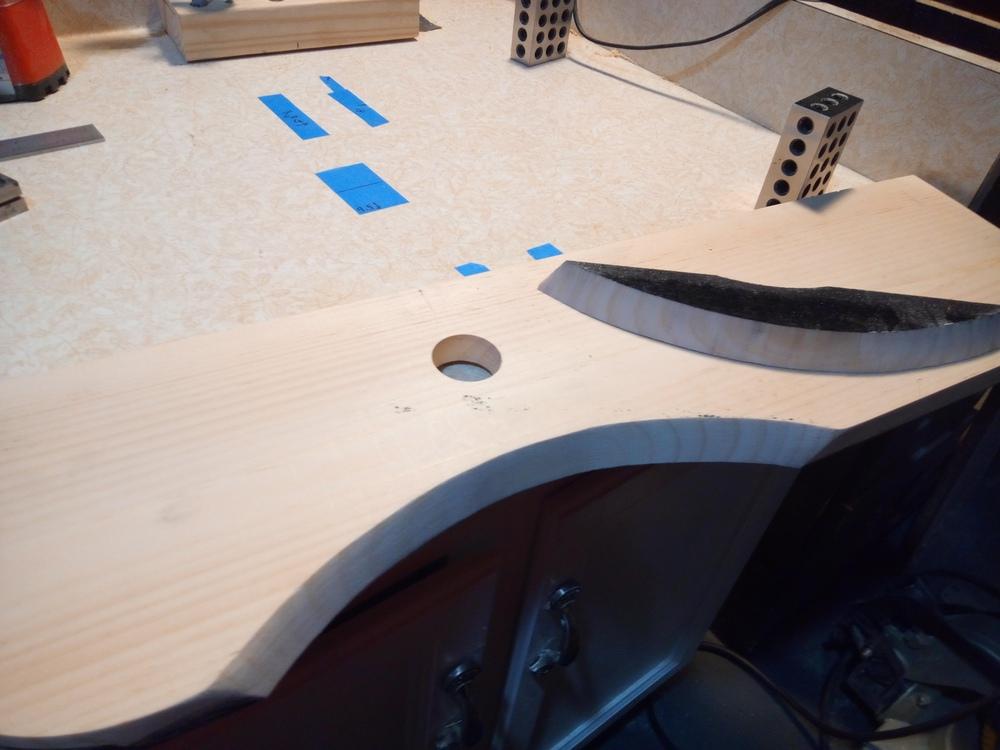
In the end I stood the log up on my glass table and shimmed it until it looked pretty "vertical" even though it was never within 1/2" of a carpenter’s framing square anywhere along the circumference. Once I was satisfied that it was vertical enough, I used a surface gage to mark a ring around the top and bottom separated by the correct final height. Here I’m laying out the second cut after the first cut was made.
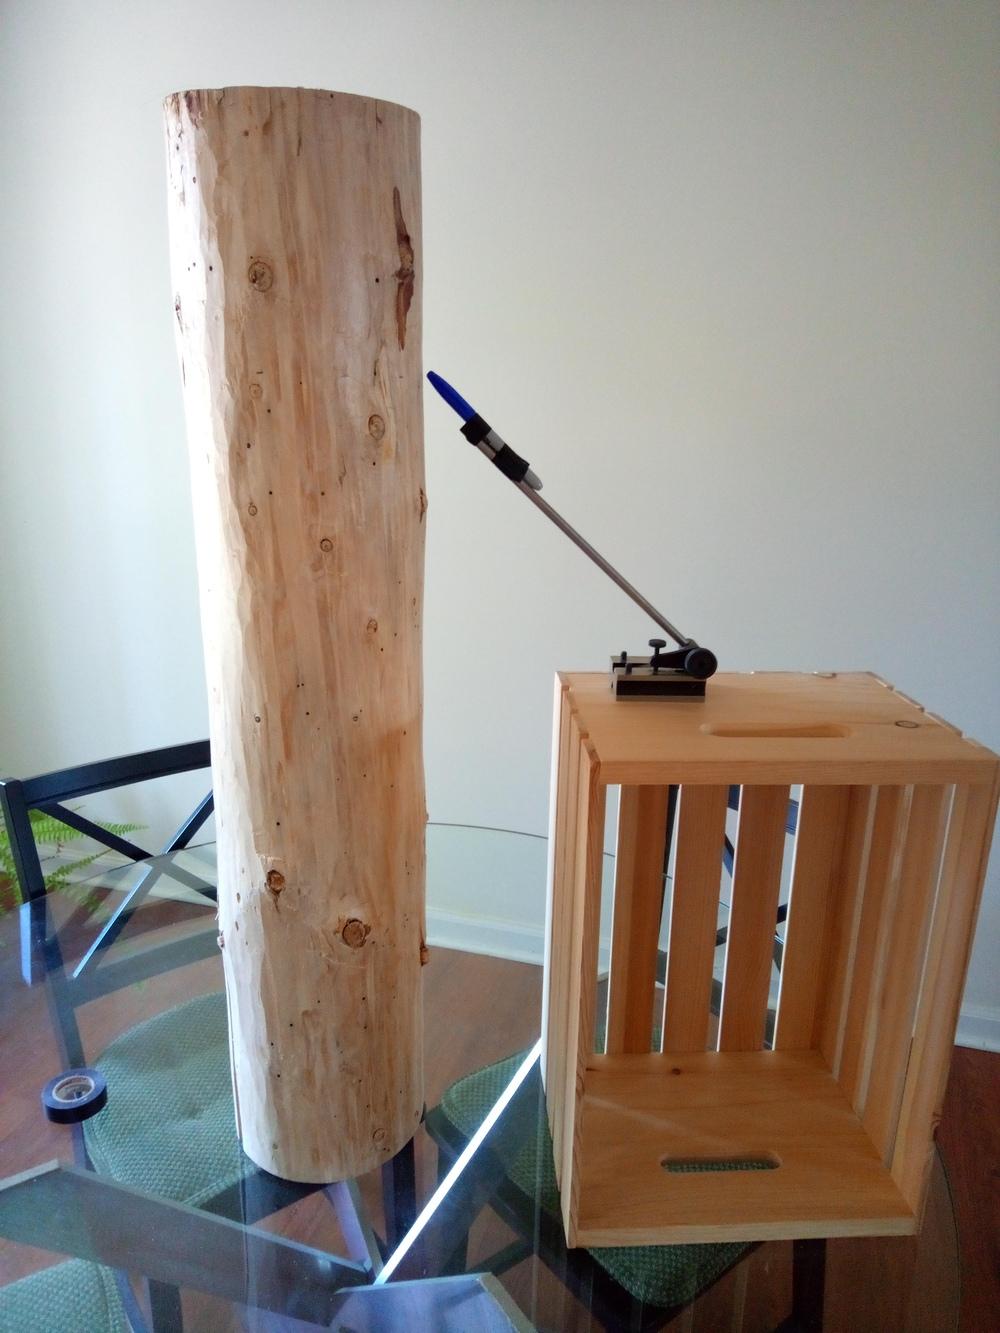
Which does invite the question, how does one cut such a thing? Sure normal people use chainsaws, but normal people aren’t trying to get the two cuts to be within 1/16" of parallel. I ended up cutting it about 1/2" oversize with a miter saw; this left alignment inaccuracies and mismatches where I had to rotate the log because my saw could only handle half at a time. I then routed out the middle leaving only a ring on the outside that would need to be accurate.
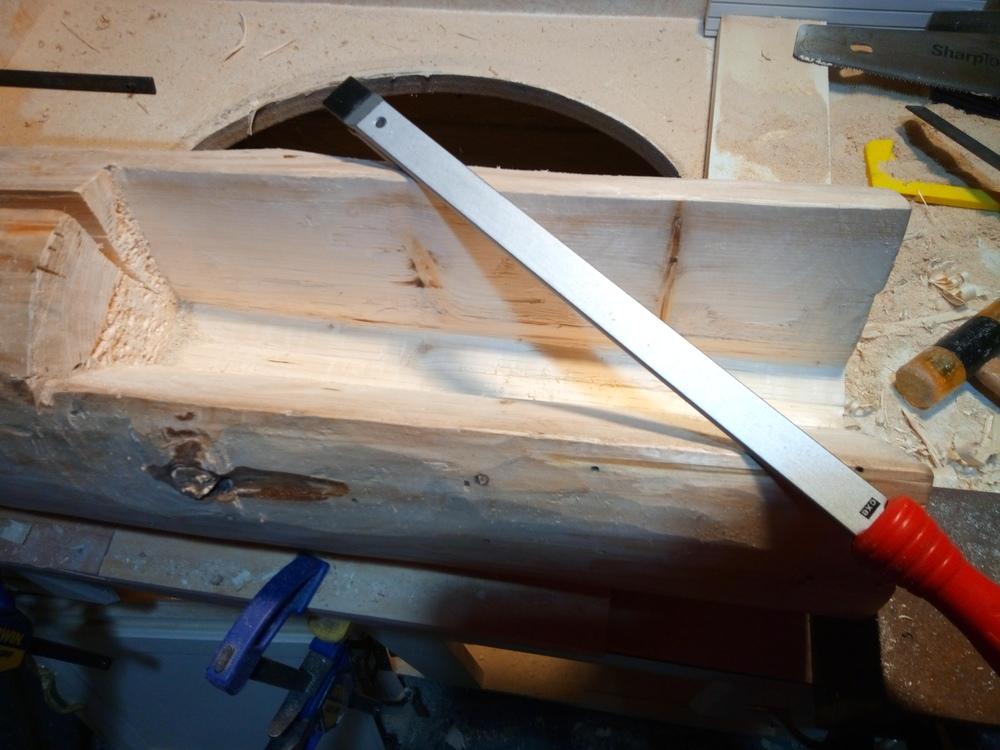
With care, this was possible to cut by hand accurately with a back saw.

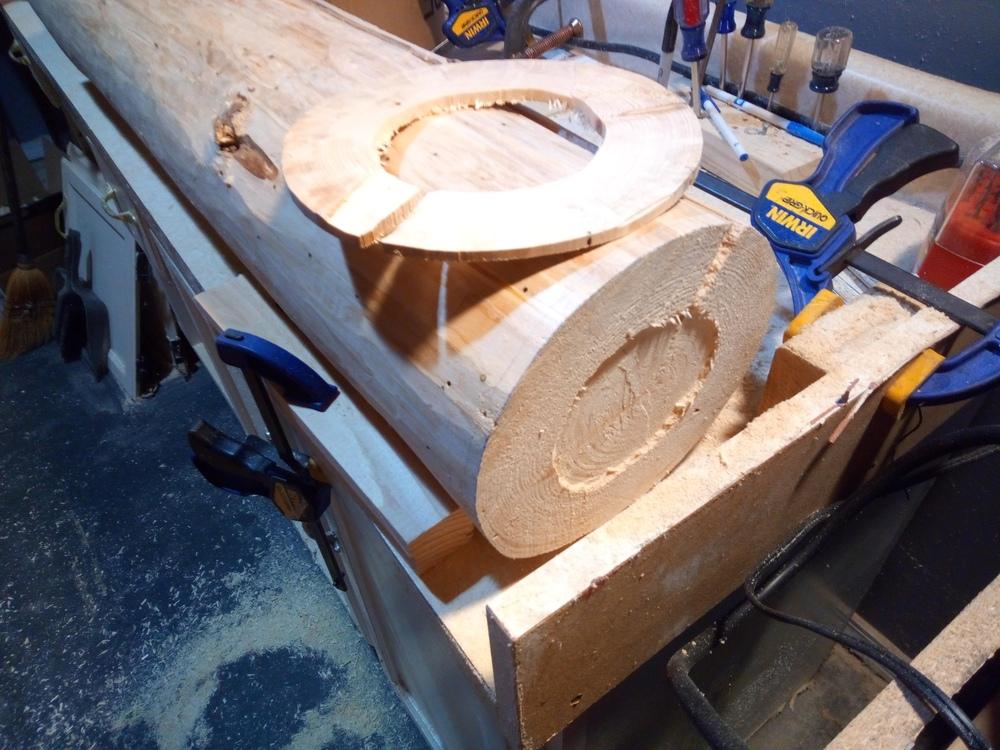
It seemed to come out decently enough.
That was just getting datums cut on the log. There was more complexity. Pedestal sinks are deceptively simple looking but I found out the last time I installed one that this is far from the real story. The instructions for that previous sink said something like this.
1. Position the pedestal.
2. Place sink on pedestal.
3. Attach sink to wall.
Note: If your wall does not include framing for a pedestal sink,
tear down your house and rebuild it so that it does.
Easy! On that project I ended up machining a thick aluminum plate that mounted to the studs and which the sink could perfectly mate to. I was going to be smarter about it this time. To start with I was going to use a proper computer model (for the first time in decades). I can’t model my ideas as fast as I can describe them in words like I once could in AutoCAD but I am slowly regaining that superpower with Blender. Comparing my virtual model with what I actually created shows that it can provide profound insight.
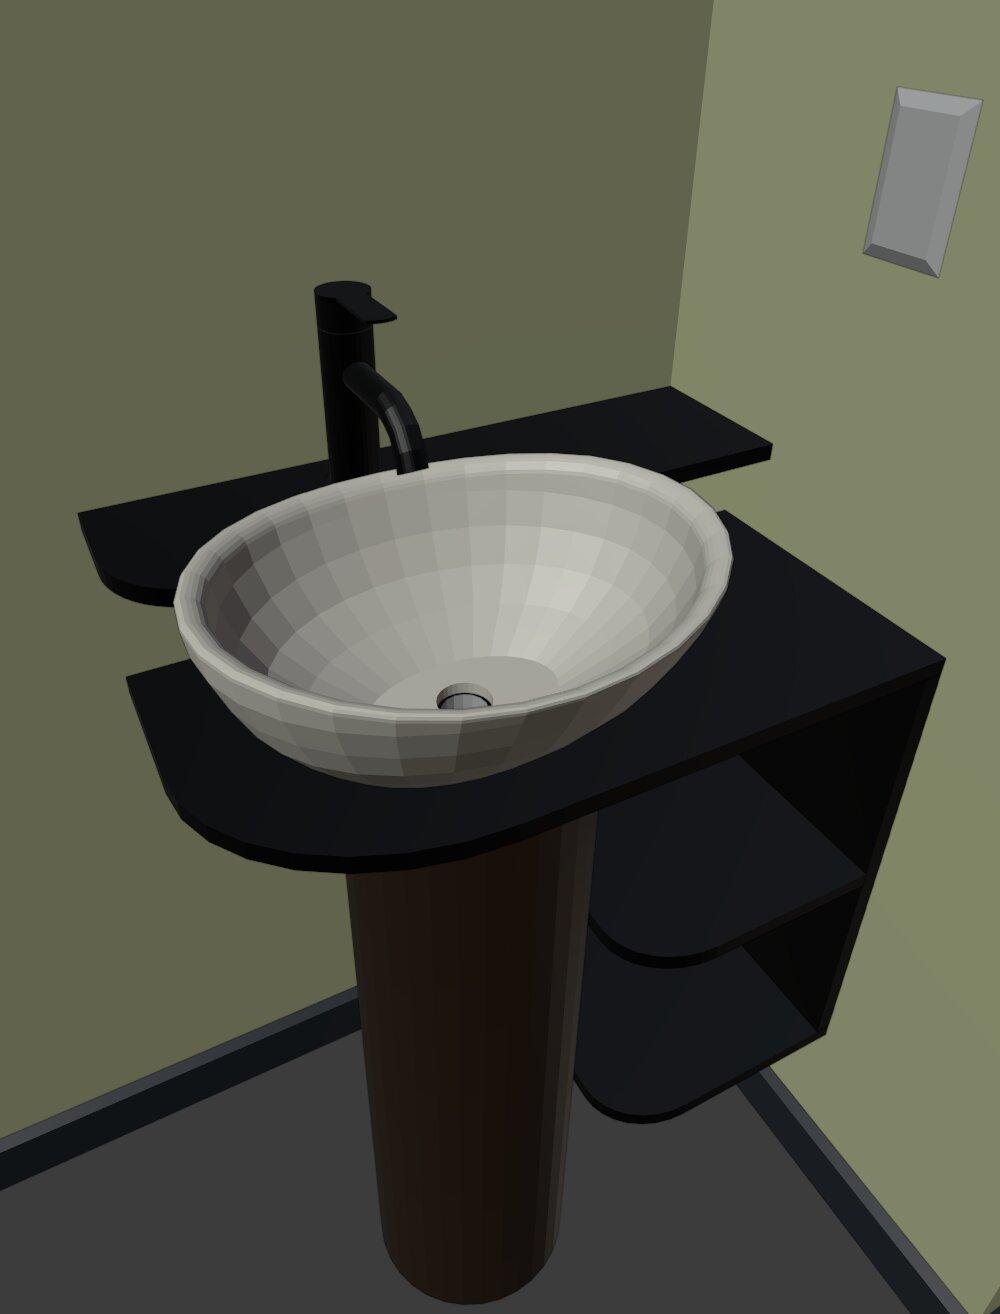
I had originally envisioned shelves coming from the wall to stabilize the log. These shelves would be a small one-sided unit that would mount to the one framing stud I had to work with (just left of the electrical outlet). The other ends of the shelves I was going to sink into the log. I realized that if the drain plumbing leaked, getting to it would be a nightmare. And since drain plumbing always seems to leak at first, I needed a new plan.
This is the point I started getting very serious about my computer model of the project. I realized that instead of having the log literally do the heavy lifting I could make the log optional. If I could slide the log out when I needed to service the plumbing, that would be very helpful. When in place, the log could still stabilize and support the system. Without playing with all the parts in my computer model, there’s no way I would have imagined that design.
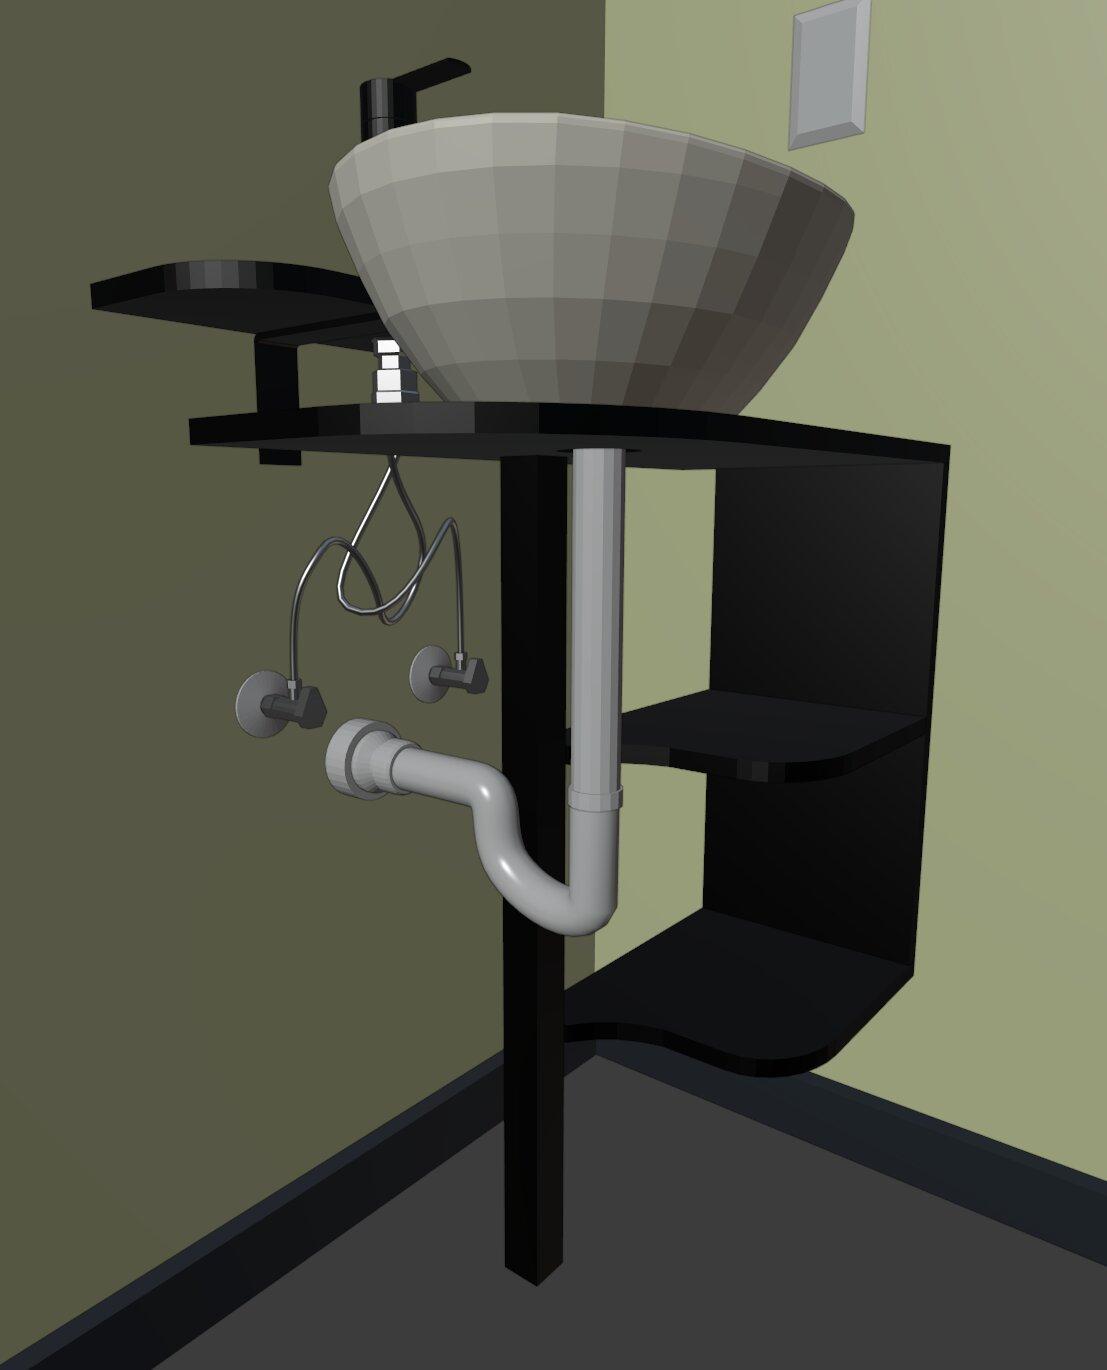
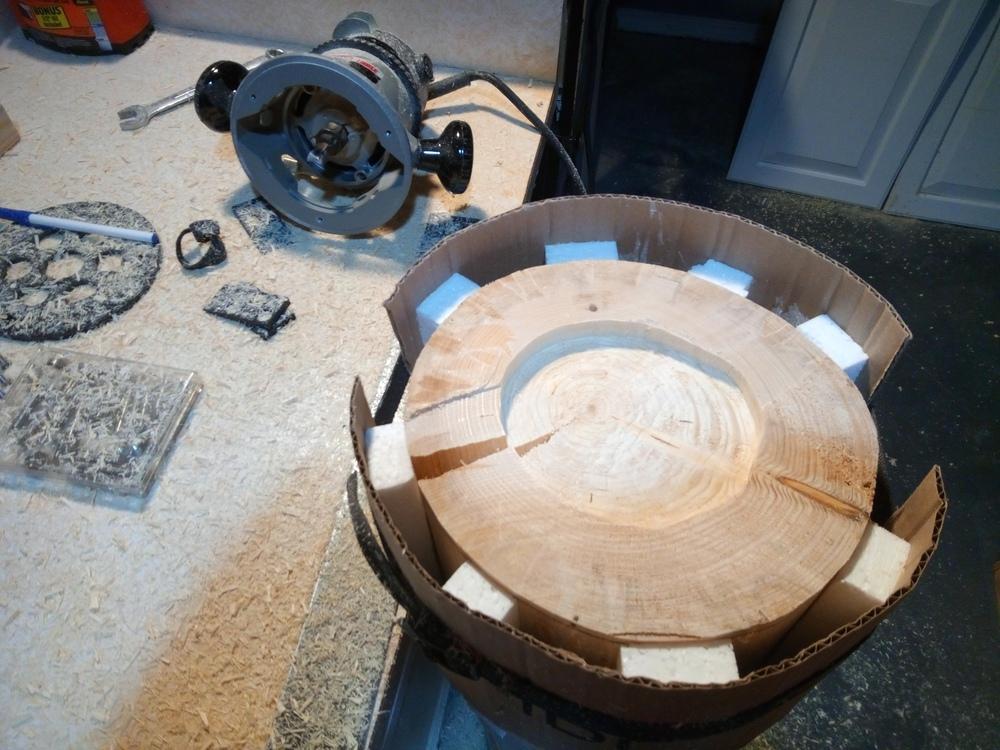
From the moment I conceived of the idea I knew that one of the most difficult fundamental problems with the concept was that a sink needs a drain and while logs are sometimes hollow, this one wasn’t. I started by roughing a channel for the drain using a circular saw and a brick chisel.
I did a lot of hand chiseling until I got it roughed in. I used my magnificent Sandvik scraper (not just for hand scraping machine tool ways!) to smooth out the surfaces.
I have to admit that when I bought the sink from The Store sight unseen I didn’t really think about how such sinks were held in place during earthquakes or toddlers. It turns out this one had two blind holes that I could use. Only what do I use for an anchor? I tried all kinds of designs that did not work. These seemed good but I could not get them open once inside the sink.
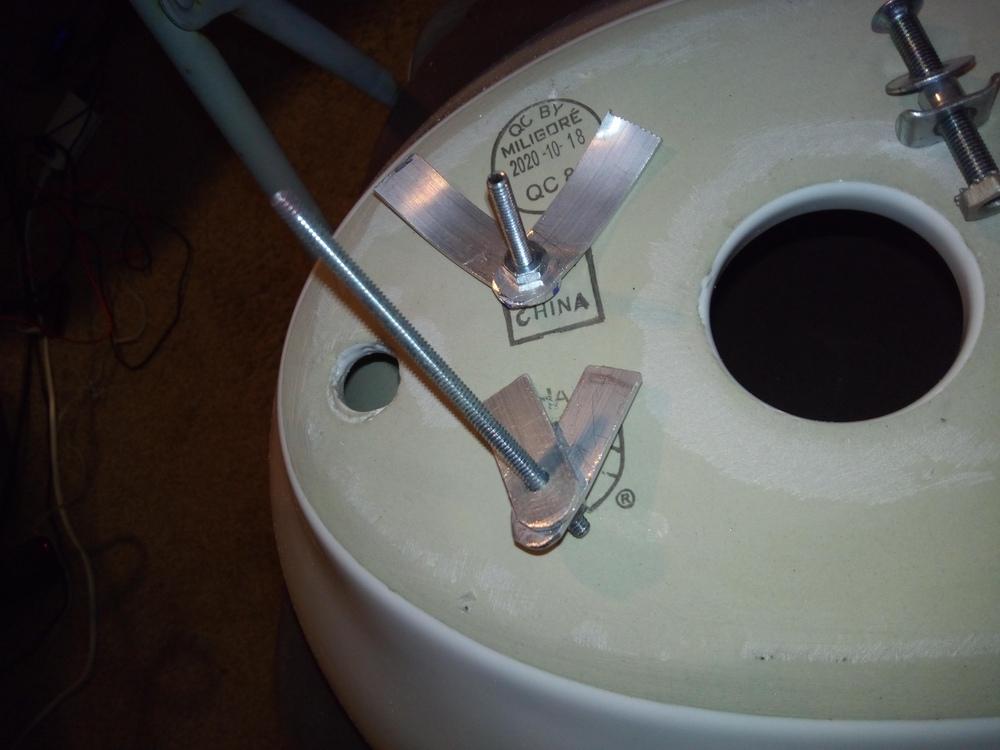
Eventually I just went with a bent piece of #10-32 threaded rod with some heat shrink tubing on the inside end.
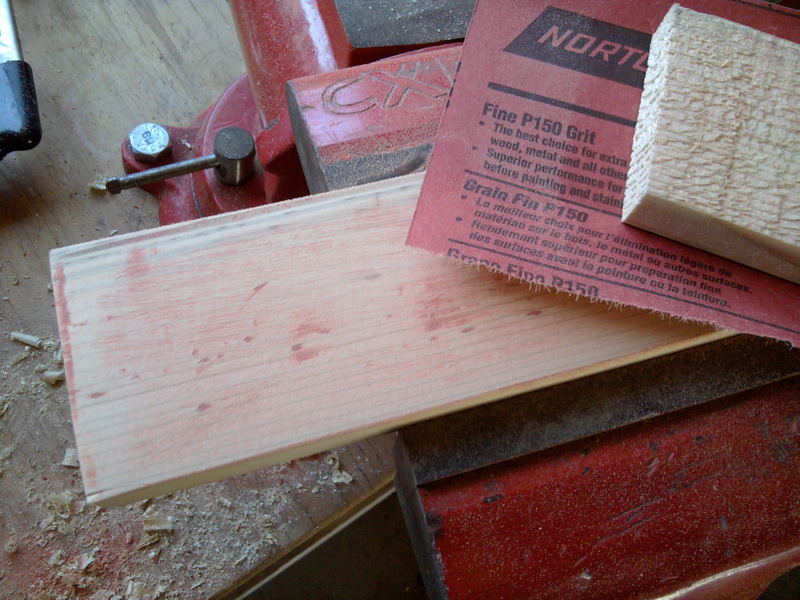
Building the shelf cabinet was also an adventure. There are three wooden dowels in the column and, because I’m a buiscuit joinery enthusiast, biscuits everywhere it is possible to put one. Since I’m not wealthy (and wood has doubled in price it seems in the last couple of years) I used cheap pine boards made from edge-glued planks. They’re decent enough but there was some cupping and I’m too lazy and unskilled to attack that with a hand plane. Given the imperfections of the boards, I feel the cabinet came out as well as can be expected. Let’s just say it’s much more accurate (parallel, perpendicular, flat, horizontal, etc) than the wall it’s mounted to.
I don’t know what posessed me to try to mate the top shelf board to the contour of the sink, but that’s what I set out to do. There was some rather heroic layout work involved that I think turned out pretty well.
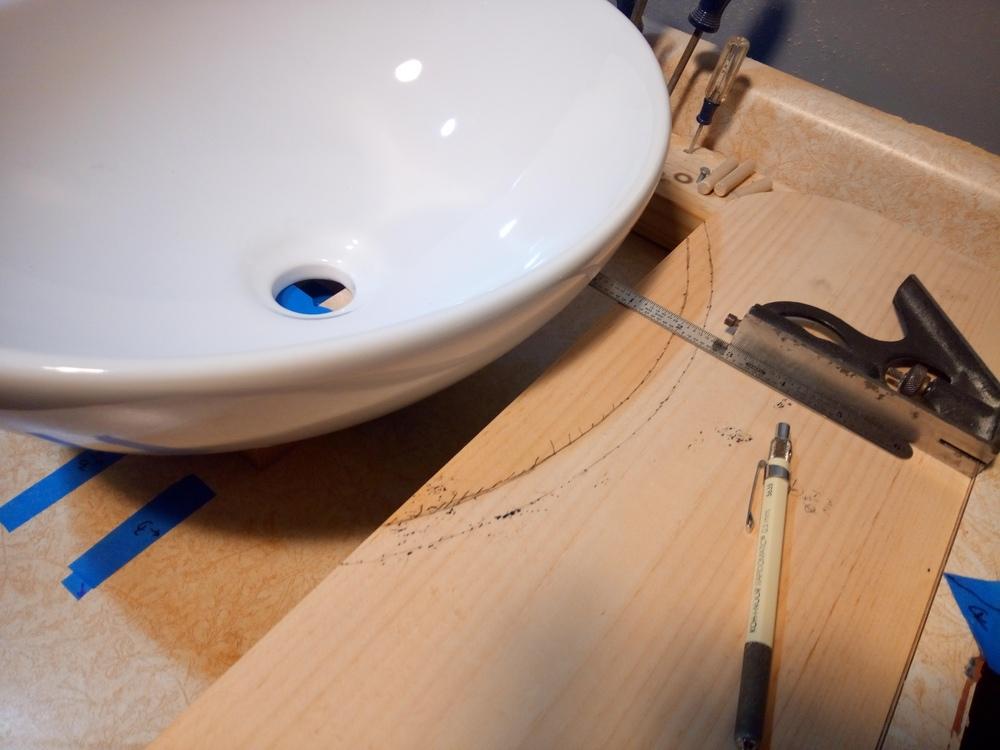
But what was really astonishing was pulling off this compound elliptical cut perfectly in one clean shot. Hut ab to my insanely excellent Swiss-made Bosch jigsaw!
And then my least favorite part of the whole deal - painting. I used boat topside paint which I figured would be sane for a bathroom feature. I kept thinking that I should fill the wood like I did on my guitar but unfortunately I was too lazy to get the proper wood filler necessary.

The painting still seemed to go ok.
For the last two years I’ve looked at two feet of janky plumbing coming out of the wall. You see that "workbench" in the pictures of the work on the log? That horror is what used to be in that bathroom and it is definitely doing a much better job as a workbench. But they had the sink shifted over a couple of feet from the supply and drain with weird cantilevered extension plumbing. So actually step one was to fix all that. I was pretty happy with how that all looked except for the ragged hole around the drain fitting.
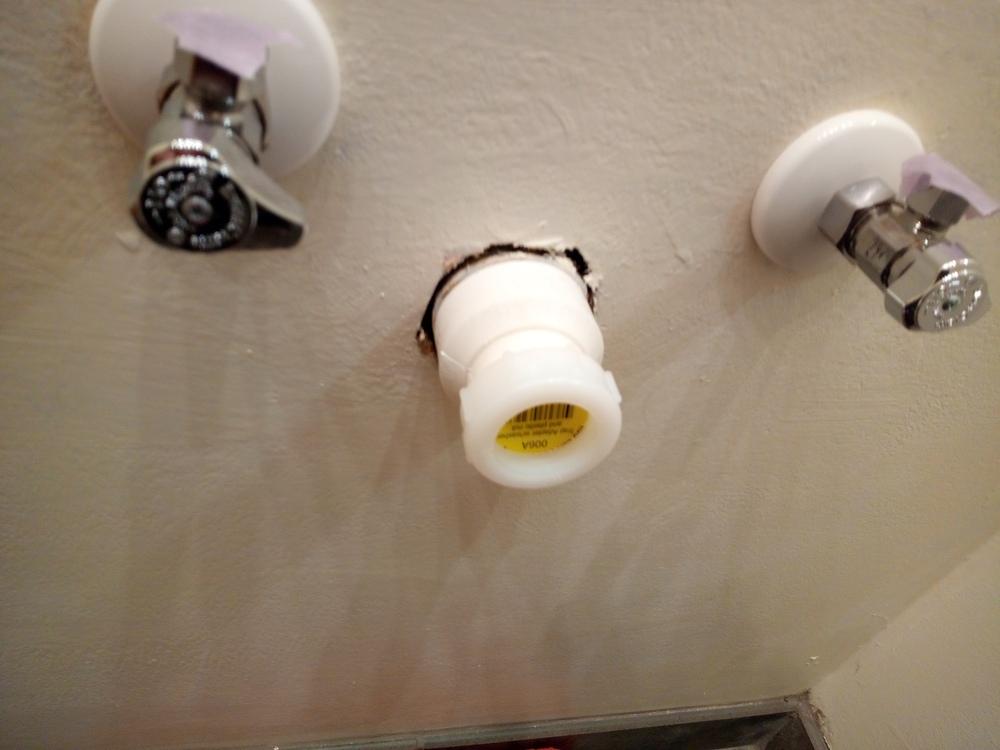
I am quite proud of the inspriation I had to use a Trader Joe’s peanutbutter container lid as an escutcheon. And also proud of being able to cut it to size perfectly.

It looks great! And this is pretty important with a pedestal sink since the plumbing is all exposed to a certain extent. I’m actually pretty happy with how that all came out.
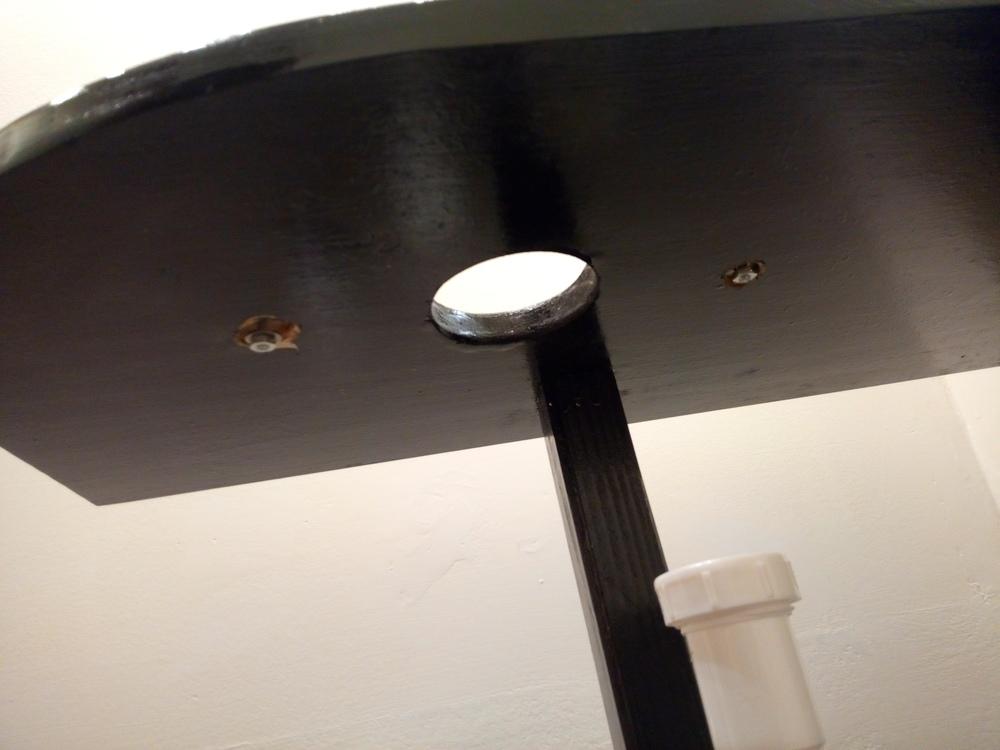
How technically tricky was this project? Let’s consider a planning mistake I did fail to prevent. I had considered counter-boring the sink’s hold-down studs just to keep them hidden from view, but I was lazy and since it’s on the underside of the top shelf, I didn’t. I was however surprised to find during installation that this feature was not optional; if the sink hold-down nuts were not recessed into the shelf, the log could not slide under. I had modeled the log’s cross section as a perfect ellipse and that simplification proved insufficient. It turns out that one of the hold-downs was exposed halfway and the other was completely covered by the log’s top.
But things get sillier. For a flavor of how this project went consider the fix. I experimented with different Forstner bits. I discovered that my 3/4" was the right size but when in testing I found it was not cutting well at all. I then dug out a set of fine grinding stones and dressed the cutting edge. Not exactly sharp, but once again plausible for cutting. I then went to cut these counterbores and realized that my hand drill would not fit between the shelves. Great. I had to dig out my router again and that worked fine, but it would have been infinitely easier had I started with that plan while the shelf was disassembled. This project was a long list of reminders why careful planning can be more essential than optional.
Here are the counterbores hacked in place in what welders nonchalantly call the "overhead position".
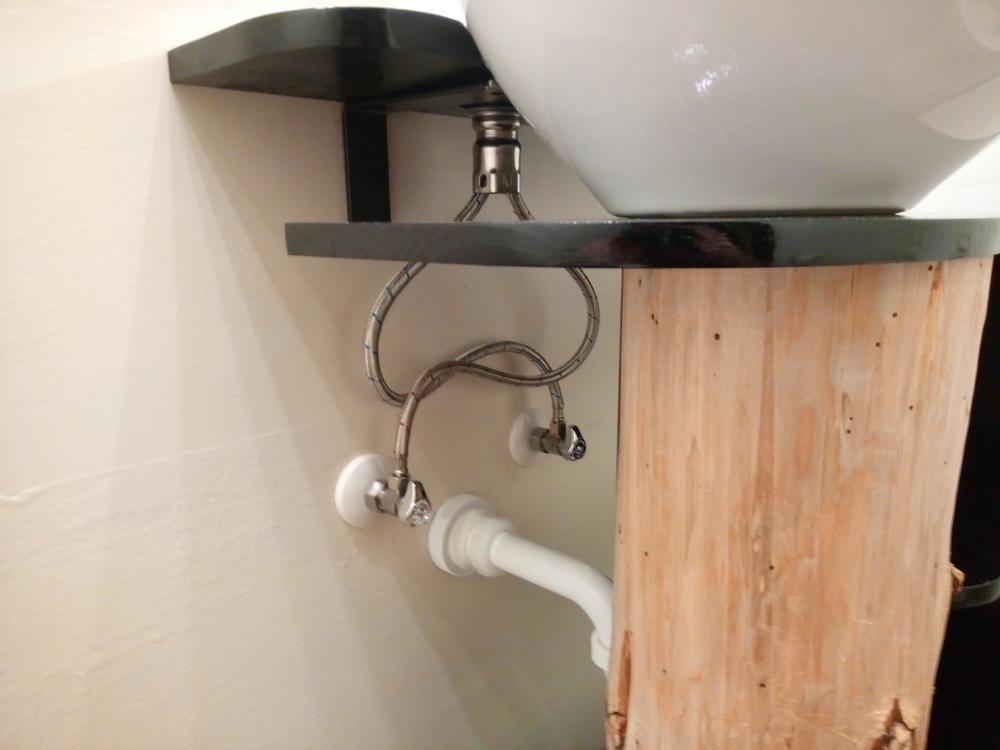
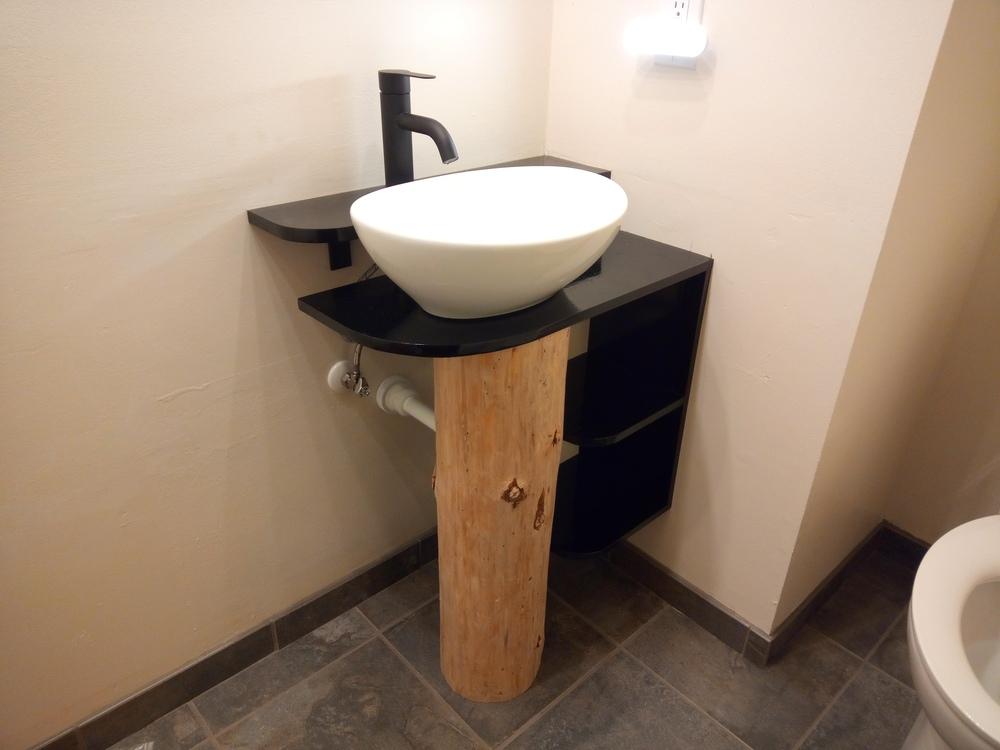
Here is the installation in progress showing the hold-down fasteners I fabricated. Here it’s easy to see how the log is designed to slide away for easy maintenance on the plumbing. You can also see my layout marks to carve clearance for the drain plumbing’s lockrings.

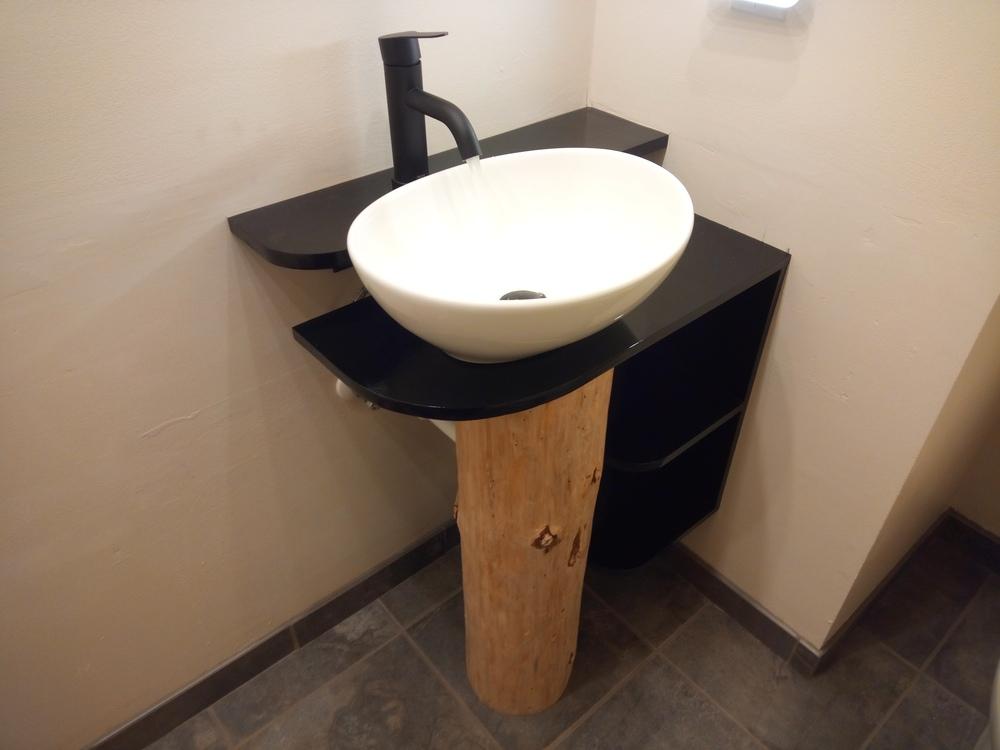
Finally here is another view of what the finished installation looks like.
And yes, it does work! In the end, I think I was successful with this project. Well, if by "successful" I mean I can wash my hands in the bathroom without a puddle on the floor after only a couple weeks of exacting labor. Does it work aesthetically? Probably not for normal people. I personally like it — as someone who has also taken "tree hugger" from figurative to literal.