Garbage And Lies - Part 2 - Renovating A House
:date: 2024-03-09 12:01 :tags:
This is part two in my series documenting my experience owning a house in Buffalo, NY. You can find part one here. And part three here.
Renovation I
Upon taking possession, I got right to work undoing the damage of the previous occupants. Houses, especially American houses which are constructed out of garbage and lies, depreciate and decay every moment. Constant maintenance and restoration is required. The previous owners spent nearly twenty years doing none of that preferring to focus their efforts on things like painting entire rooms black or aqua, ruining woodwork with incompetent painting skills, punching holes in doors, etc.
The first thing I did was replace the sump pump. The last thing I
needed was this decrepit single point of failure to spontaneously
produce an indoor swimming pool in the basement. Clearly the instinct
to replace this was correct because the old one's check valve was
found to not be functional forcing the old unit to pump 4X liters of
water to expel every liter.
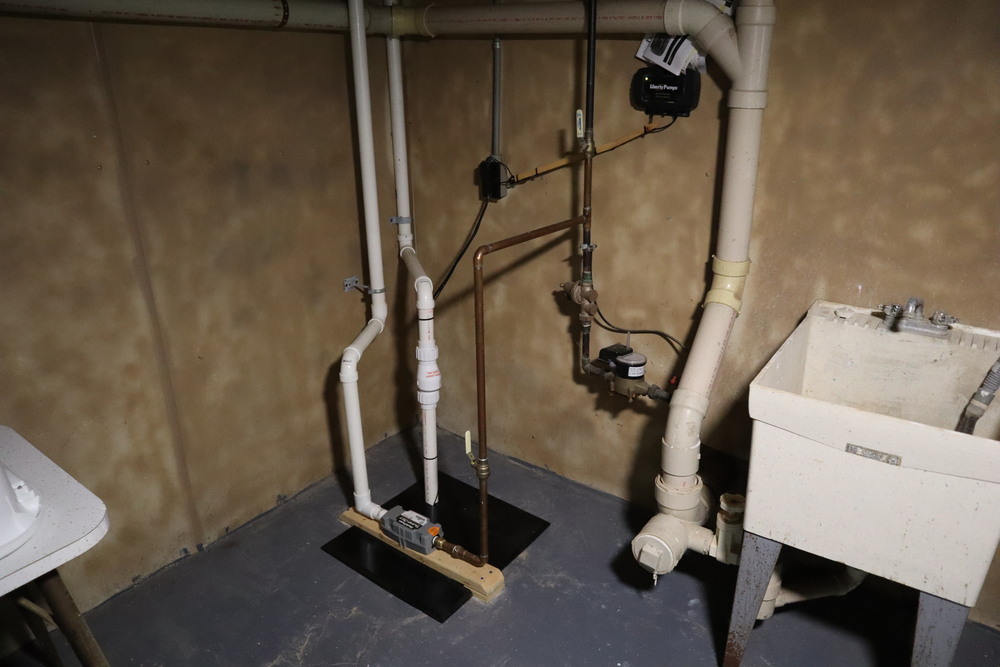
This new installation is not perfect, but it was a huge improvement. It includes a backup pump (gray box) that runs on water pressure. You can read a detailed post about my sump improvements.
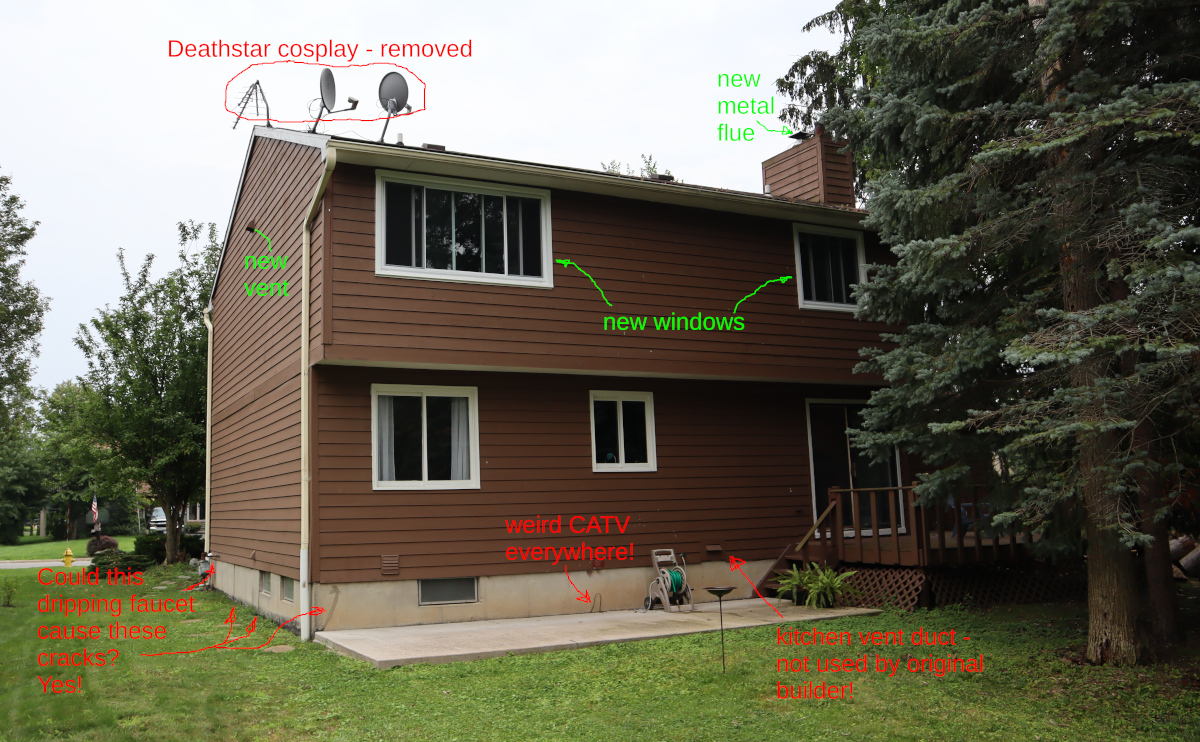
The plumbing generally was abominable. There was one shutoff valve in the entire house! That blew my mind. And it was clearly about to fail. I had a new main shutoff professionally installed before I personally installed shutoffs on every toilet and sink. I also put shutoffs to the outside sill cocks and replaced the extant leaky ones with freeze resistant units. By the way, this may sound like getting overly nerdy about plumbing, but this is exactly the kind of thing that can destroy your house. That sill cock leaking a drip every two seconds for years made the yard always wet and swampy and that excess water exerted a hydrostatic pressure on the basement wall that over time was going to develop cracks as a result and leak water into the basement. Just fixing a simple spigot leak was probably one of the most important things I did to maintain that house's longevity. The gutter covers I installed to keep the forest out of them is another such intervention. Do not let water build up around your house!
I also went around and replaced all outlets and light switches. I have no idea why Buffalo, NY developed the idiosyncratic practice to have outlets upside down but since about a quarter of my outlets were also wired incorrectly — seriously! — it seemed like a good opportunity to rewire the entire place properly. I also pulled out hundreds of feet of defunct wiring. It was insane! The place was choked with CATV cable like an invasive vine that had been left by each season of cable installer. (When I had the Fios installed, I watched the installer like a hawk... and he still managed to rip open a duct while I wasn't watching and leave it leaking air with the cable running over the sharp metal tear he had made. Incredible. Yes, I fixed that too.) I also finally was able to get on the roof and remove an old VHF antenna and TWO defunct DishTV receivers.
After sorting out the water and electricity situation I moved on to the three bathrooms. In each one I pulled up a minimum of three layers of garbage flooring. It was incredible, like some kind of demented archaeology dig. One bathroom floor was very not horizontal, the cause of which I never quite figured out (probably flooding at some point causing warping). Once the garbage layers had been painstakingly pulled up, I had good tile floors put in all bathrooms, one of the few things I did not do myself. I then replaced all three of the toilets. The one on the slanted floor was a serious challenge to install plumb but I did it. You can't really see the shim that raises the right side of this toilet 3/8" of an inch, but I can.
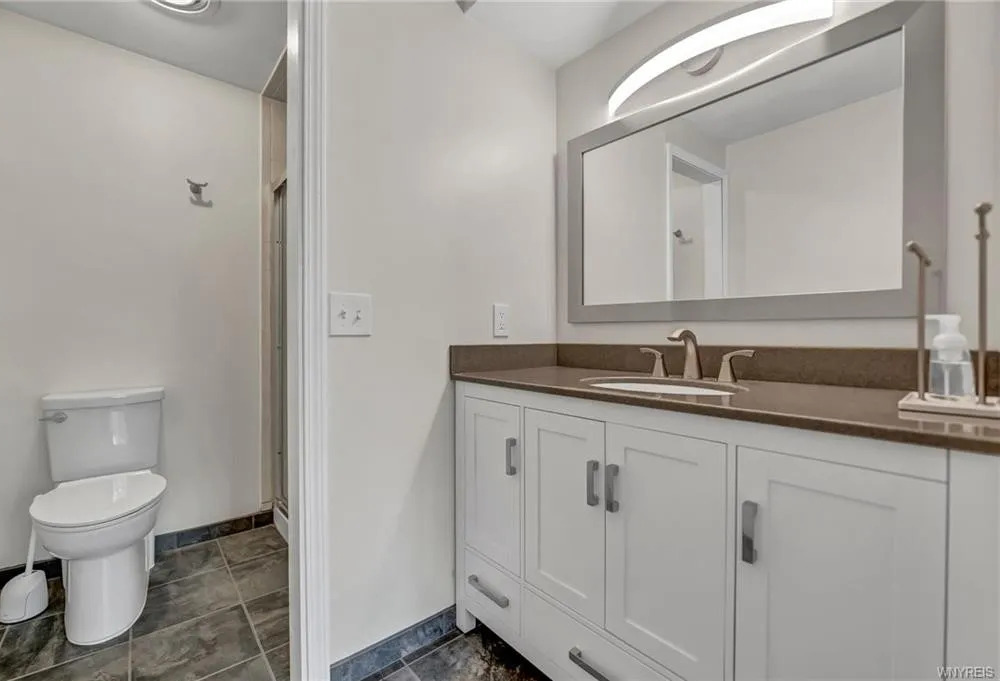
I replaced all the bathroom sinks. I had the shower resurfaced. The downstairs bathroom sink took me a while but it finally came out well — I wrote about that project here.

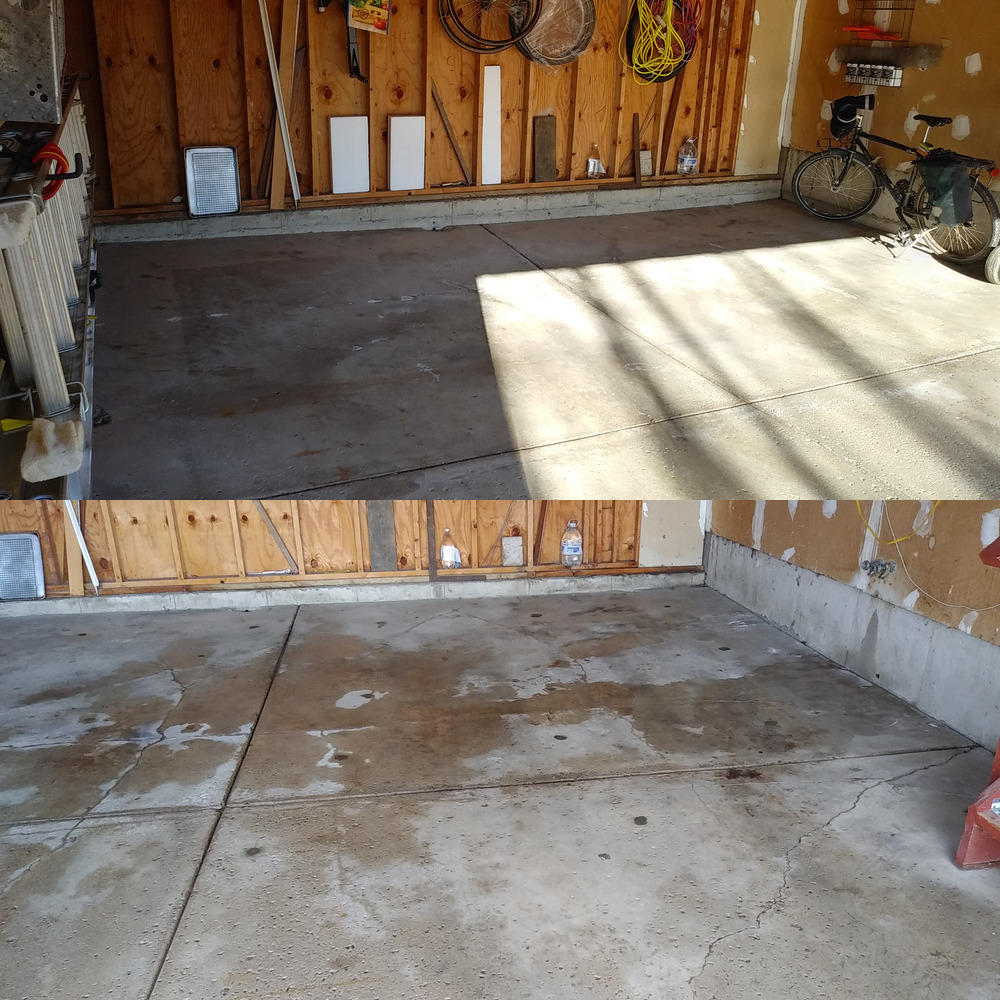
In addition to fixing the shower vents, I did some other major improvements. I had the slab in the garage jacked up into its correct place with a concrete pump (six inches on one wall!). The guys who did that were surprised how much it had settled and how much volume was missing under it. Here is the garage floor before and after they raised it. Note the line on the top photo which is where the floor had sunk from.
I had some stumps removed and some dead ash trees cut to remove liability of them falling on the house. I removed the ridiculous 1970s intercoms that were in all the bedrooms. I put a new light over the kitchen sink, new lights in the garage and basement. Two of the bedroom windows were replaced; this greatly improved the view and functionality of the master bedroom window. The best thing I did for that house that I enjoyed myself was to add an efficient modern insert fireplace. Consider for a moment that before I had the engineered metal double insulated chimney flue installed, the chimney itself was made out of the exact same material that one was supposed to burn in a fireplace.
I painted all the awful — dark, hard to cover — room colors. By the end of living there I had repainted almost all of the painted surfaces. I also had to paint over much of the finished woodwork because the previous owners had been so careless and incompetent with their painting operations.
At that point my mission in Buffalo was over. The town itself had done me no endearing favors or provided any plausible prospects and it is no longer suitable for my winter hobbies. I was ready to leave. Though I was pretty tired of working on that house, there was much more to be done to prepare it properly to sell. I had known that the next major renovation had to be the rather dreadful kitchen.
Renovation II
The specific problem I faced that prevented me from even starting on this work is kind of surprising and worth understanding if you want to properly understand American houses. Conceptually the idea is that I'd tear out the cabinets and pull up the floor. Then paint, put back some new cabinets and put in a new floor. I did extensive computer modeling of the new plan and was sure that moving the fridge would be a major ergonomic improvement. But here's the problem - I couldn't move the fridge, not even to just pull up the floor. It was tethered to the wall with something I dared not touch - a water line.
Funny side note — when I was in college I thought that having a fridge that dispensed water was some kind of gold standard for living the good life. And when I graduated I quickly bought a brand new one. But I soon discovered that the concept is maybe better than the execution. In addition to the obvious plastic taste one should expect, the water lines and ice making equipment develop a kind of white growth that I'm not keen on for taste and other possible reasons, etc. As a rule, I no longer use water supplied by refrigerators.
Today in the USA of course, fridge water is universal. In new houses built of garbage and lies, there is often a special hookup for fridge water. But the idea was a novelty when my house was built in 1978. What typically happened was that a new appliance would be delivered and the installers would simply drill a hole in the floor, run flexible 1/4" copper tubing down the hole to the nearest cold water supply pipe, and then rudely puncture it with one of these pernicious devices.
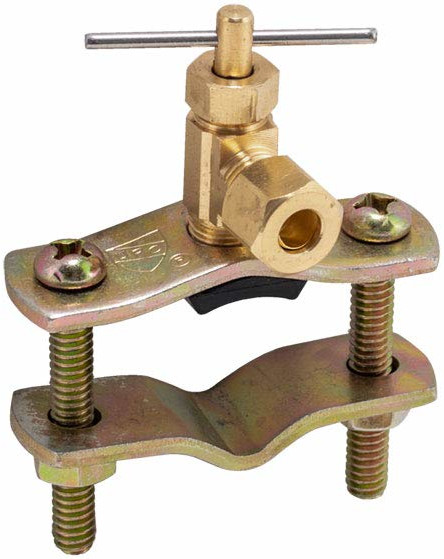
In theory, one should be able to close the valve and disconnect the line and you can (nervously) ignore it. What I have always feared would happen would be that something goes wrong with the valve and you can't shut it off and you can't even replace it (because the punctured hole may not match a replacement). And, wouldn't you know it, that's exactly what had happened in my house. When I moved in, this shit valve actually was ominously gummed up with a JBWeld "repair". I went to the plumbing supply store that had often given me good advice and asked them how to correctly tap into plumbing for fridge water service. They proposed these same destructive valves as the only way they knew of!
That was exasperating and it took quite a long time before I figured out a "solution" that really involved a clean substitution of one janky problem that was impeding progress for another equally bad janky problem that wasn't. I shut off the water, cut out the entire section with the stupid fridge water tap, and jammed on a SharkBite flexi-hose. Done. Is that a real solution? No. Is it even good? No. Is it worse than what was there? Weirdly, no. But at that point I could finally rearrange my kitchen. Like these last four paragraphs, it's the little things that can really waste a lot of time.
It didn't take long to gut the cabinetry. I kept some of the facing frame members which were made of some very hard old wood. But mostly the cabinets were made of garbage and lies. Here's one that was filled with mouse poop.

Pulling up the floor — floors — was another odyssey into the archaeological past exploring the different disquieting ways our ancestors used to cover their kitchen floors with garbage and lies.
I was blown away by the incompetence and horribleness of what I uncovered. For example, the power cable for the garbage disposal emerged from a hole in the drywall that was likely made with a hammer. The dishwasher's power just came up through a splintery hole in the floor's plywood. I put proper boxes on everything and improved the cable routing. I put another 1/4 turn shutoff valve for the dishwasher to match the other two I'd put on the sink supply.
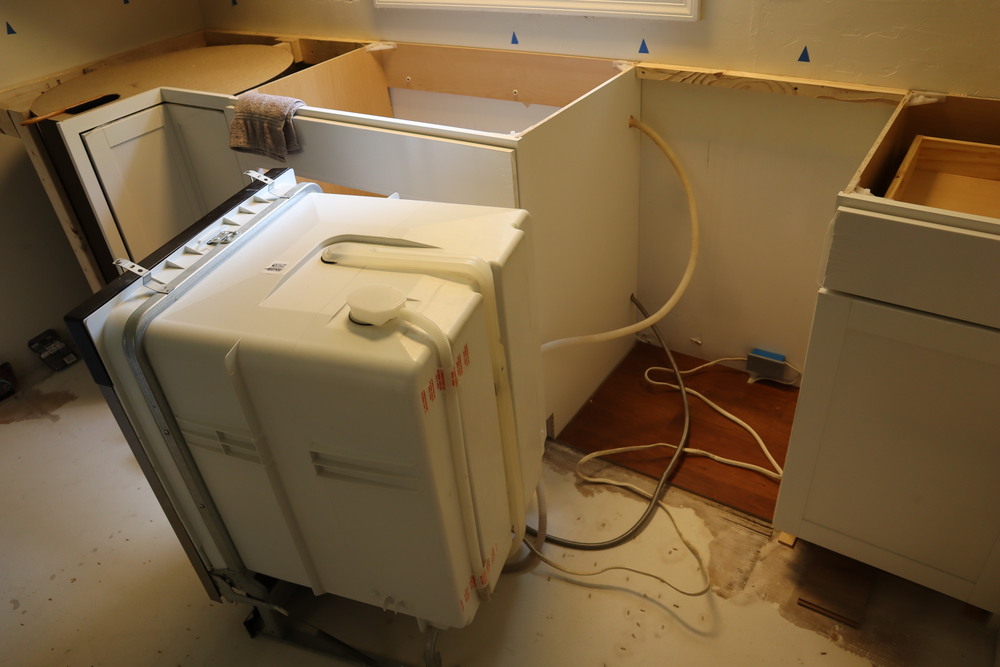
While doing all this work I studied the duct work in the basement very carefully and came to the conclusion that it must go up the wall to provide for stove venting. It's obvious now, but that just seemed like an impossible conclusion given that there was a stove vent and it didn't use this duct. I was already committed to drywall repair so I went ahead and cut some exploratory holes and sure enough, there was a duct there leading to the outside that had not even been opened.
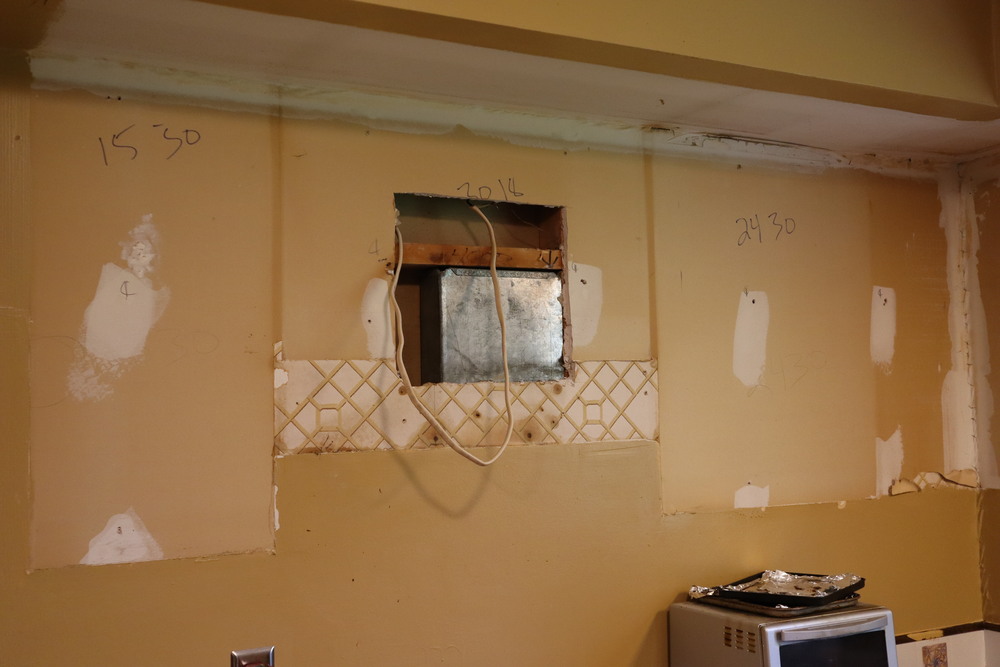
The original drywall goons had expediently covered it up and the appliance installers had no idea it was there. And the occupants of that house spent 45 years ripping batteries out of the smoke alarms every time a toaster was turned on. Just incredible. In the end, I made a properly sealed connection to it with a venting microwave unit — a massive improvement all around.
I had planned to reuse the old sink but once the improvements had started to take shape it seemed like an eyesore. It's impressive how you can order reasonable components at reasonable prices from The Store. That's where the nice sink came from. We were in a bit of a hurry to acquire the cabinetry so we went to one of those big house part stores and bought a set of the line they keep in stock. In retrospect the better plan would have been to order the cabinetry as flatpack from the internet. The problem with pre-assembled cabinets, besides being very limited in selection and availability, is that they can be easily damaged before you even get them. We had the tall cabinet delivered and it was cracked upon arrival requiring some repair work that exceeded simply assembling cabinets.
Still in a hurry to acquire the materials, we needed countertops and had no plan for what to use. One of the biggest lies in real estate is that granite (and marble) countertops are good and sensible. I have them now in my current apartment and they are fragile, discolor easily, need special care with questionable chemicals, contain radioactive elements, dull knives, easily shatter glass and ceramic, and obscure what needs to be cleaned. What's worse for people who can do a little math is that granite countertops will turn a $100k shitty house into a flipper's $200k shitty house. I'm no doubt lighting hundreds of dollars a month on fire to rent mine right now.
While it was tempting to fool some idiot into vastly overpaying for the house based on this insane fad, I just couldn't do it. And I mean literally — that would require contractors and good luck finding anyone. (Competent, timely, cost effective — you can never have all three! With some jobs I tried to hire help for, I couldn't get any!) I needed a countertop solution that I could install myself immediately.
In my opinion the best countertop is butcher block wood. If you don't like the look of wood in general, I've got some bad news for you about how humans usually construct dwellings. First off, wood is relatively easy to work with — I managed it with little trouble. It's solid and functional but also light enough to handle and move comfortably and doesn't need special reinforcement. It's quite stable and accurate. It's what's under most laminate counters. The seam I created where the two pieces meet in the corner was out (flatness) by about .006" which is much better than the alignment of my current granite counters. An unappreciated feature of wood is that if you damage it you can refinish it, or, because it is one of the cheapest counter materials, simply replace it. It's really the easiest material to swap out. We found a wooden countertop was a pleasure to use for kitchen work. So much so that I currently have a slab of the extra cuts from it sitting on my granite countertop. In summary the wooden countertops were available, cheap, tractable, relatively quick to install, and in the end, looked fantastic.
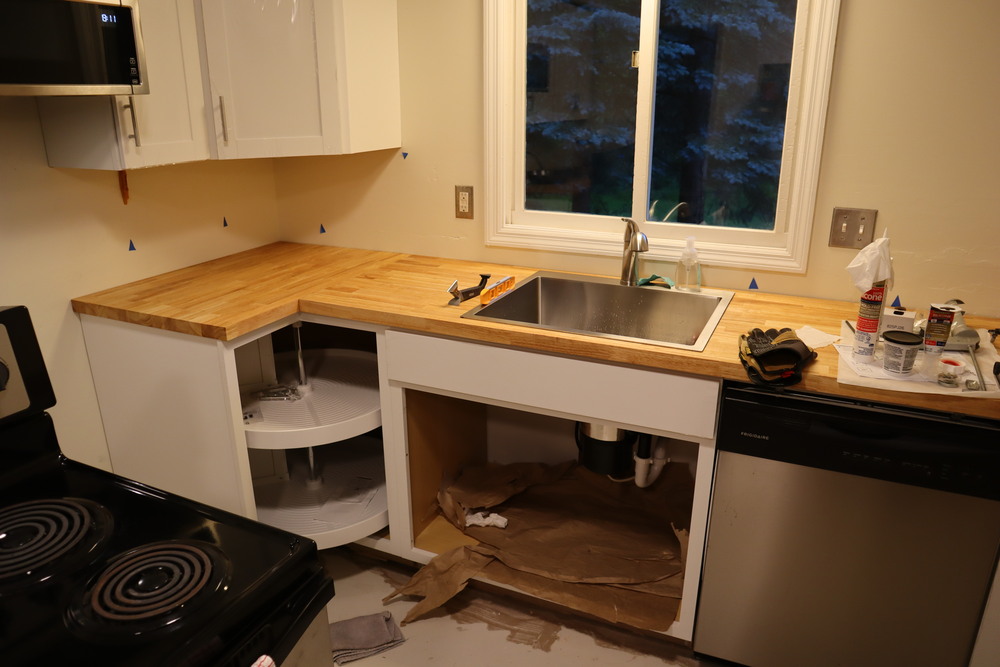
When it comes to house renovating, it is never enough to simply be able to do everything extremely well. You must also be able to achieve a good result when the house you're attaching your work to is wildly misaligned. One problem that was typical of the whole experience was that the floor in the NW corner of the kitchen was 3/4" (20mm) higher than the floor in the SE corner of the same room. So getting a counter top to make any sense was really more like sculpting than installing cabinets. To put it in perspective, the previous counter installers were sure that it would be ok to just bend the particle board counter body that 3/4". And yup, an orange would roll off of it if you were not careful. My countertops were dead flat.

That photo also shows the weird ledge in the foreground that I had to dream up and build (hand planed) to replace the atrocious counter top that was there. That counter didn't match the others, no doubt because some previous round of kitchen counter replacement couldn't figure out how to deal with this weird thing. My solution isn't great, but it's not bad given the very difficult geometry I had to work with.
With the kitchen remodeled, it was finally time to put back a new floor. I had pulled up the flooring from the kitchen and that required pulling it from the dining room. We also did the front hall just to make a clean sweep of all non-carpeted floors. One of the things that really bugged me about the house as I bought it was the ostentatious incompetence of whoever had installed the previous floor. When you are very inexperienced with putting in flooring and you put down a few rows and realize that all the seams will be in the same place if you don't cut and stagger the boards, well, you pull it up and, if necessary, go spend another $30 to buy another box and you try again! Not only could the person who installed that floor in 2008 not foresee that obvious problem, but once it was manifest and glaringly obvious, they didn't bother to correct it. It boggled my mind every time I was in the kitchen.
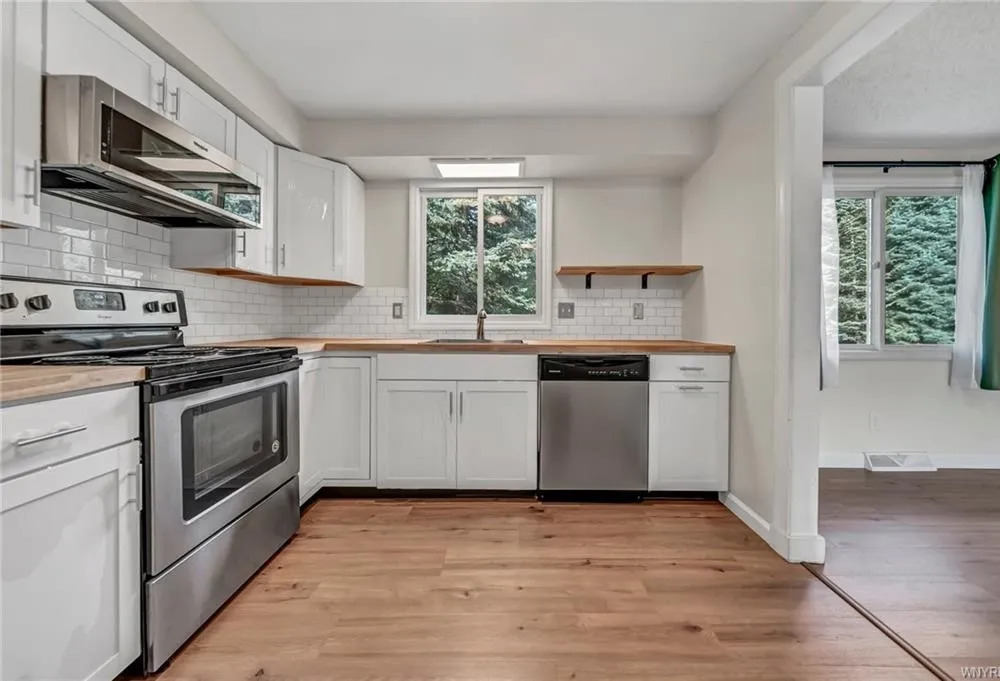
I'm not saying it's easy to get all the seams to be distributed perfectly. But we came pretty close. The floor we bought had about a dozen different fake (lies!) wood grain patterns and we also did a pretty great job of making that repetition very hard to detect. What bugged me most about the flooring itself was the connector design. Every board end must be knocked into the end of the previous. Before they're pressed together, their connection flanges take up 5/16". That leaves 1/16" to jam a tool between the wall at the end if you're trying to leave 3/8" expansion. And that's fine with me and my machinist sensibility. But it's not fine with the walls which were wildly not straight anywhere. I did the best I could but always had the feeling there was a fundamental design problem when only 1/16" was left for a tool to exert enormous forces right up against a delicate wall.
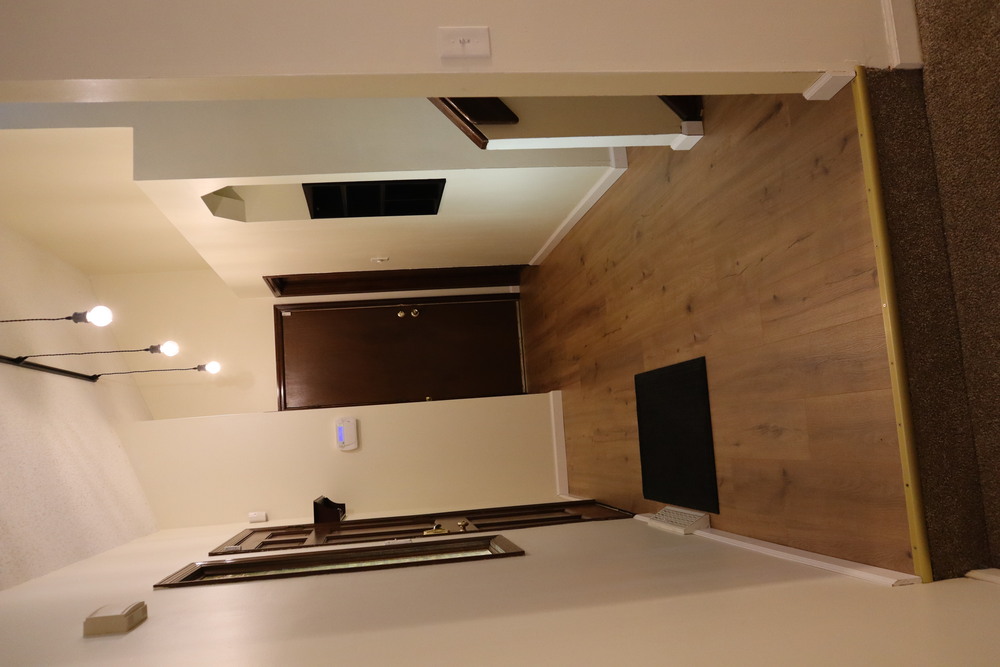
While the floor was up, I also finally was able to paint over the awful red on the walls in the front hall. This involved some rather challenging high ladder work but I managed to not fall to my death. With lighter color walls, the place looks so much brighter. People think that "a splash of color" will "brighten" a place up but it usually has the opposite effect causing the walls to eat all the light in the room. We also put in a new track light that was a massive improvement.
There was a lot more I didn't mention and we could have kept going indefinitely but after getting all the worst rooms mostly rebuilt and into reasonable condition, it was time to sell!
Timeline
| 2023-05-15 | solved the fridge supply impasse |
| 2023-05-18 | all floor up, old cabinets removed, sink out of service |
| 2023-05-24 | kitchen walls all repainted |
| 2023-06-01 | !! 10 day break - travel |
| 2023-06-16 | all new cabinets in |
| 2023-06-20 | flooring purchased |
| 2023-06-23 | countertops installed and sink service restored |
| 2023-07-01 | finished hall painting and new hall floor |
| 2023-07-04 | finished new kitchen floor |
| 2023-07-06 | !! 6 day break - travel |
| 2023-07-21 | !! 7 day break - travel |
| 2023-08-04 | finished custom kitchen/dining room ledge woodwork |