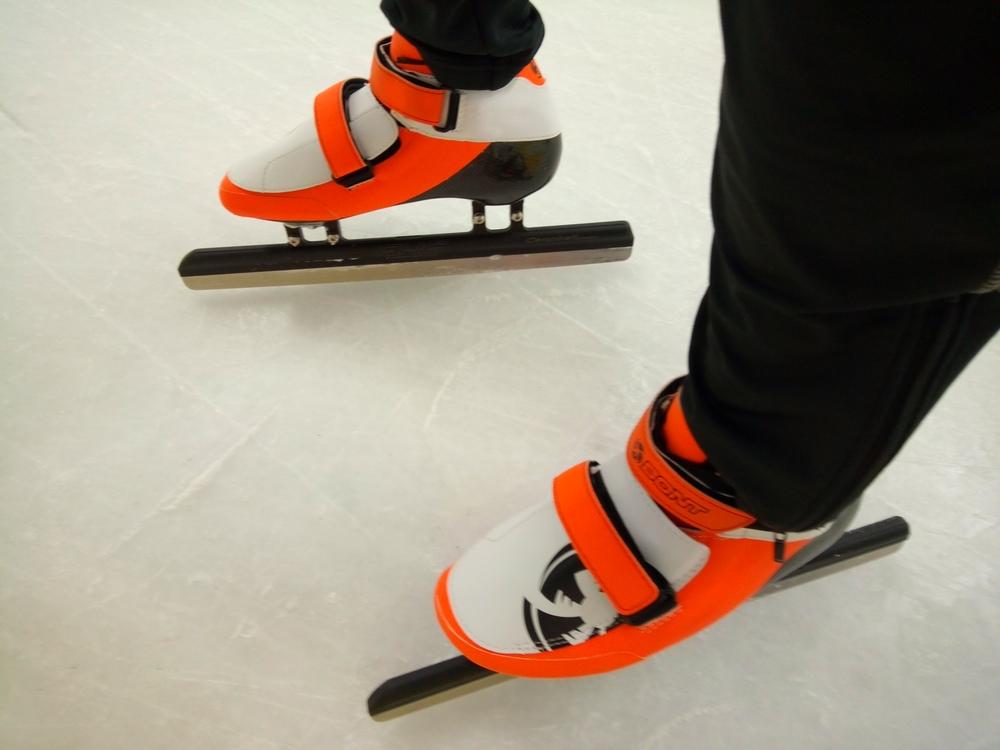
As I’ve written about before, for someone who does not compete, I have a pair of absurdly nice ice skates. This however is the story of why I have not been ice skating in a few weeks. This graphic tells you way more about ice skates than I’m sure you care about. Rather than read all that and worry about details, just roughly absorb the point that ice skates are quite technically specific and people get very fussy about them.
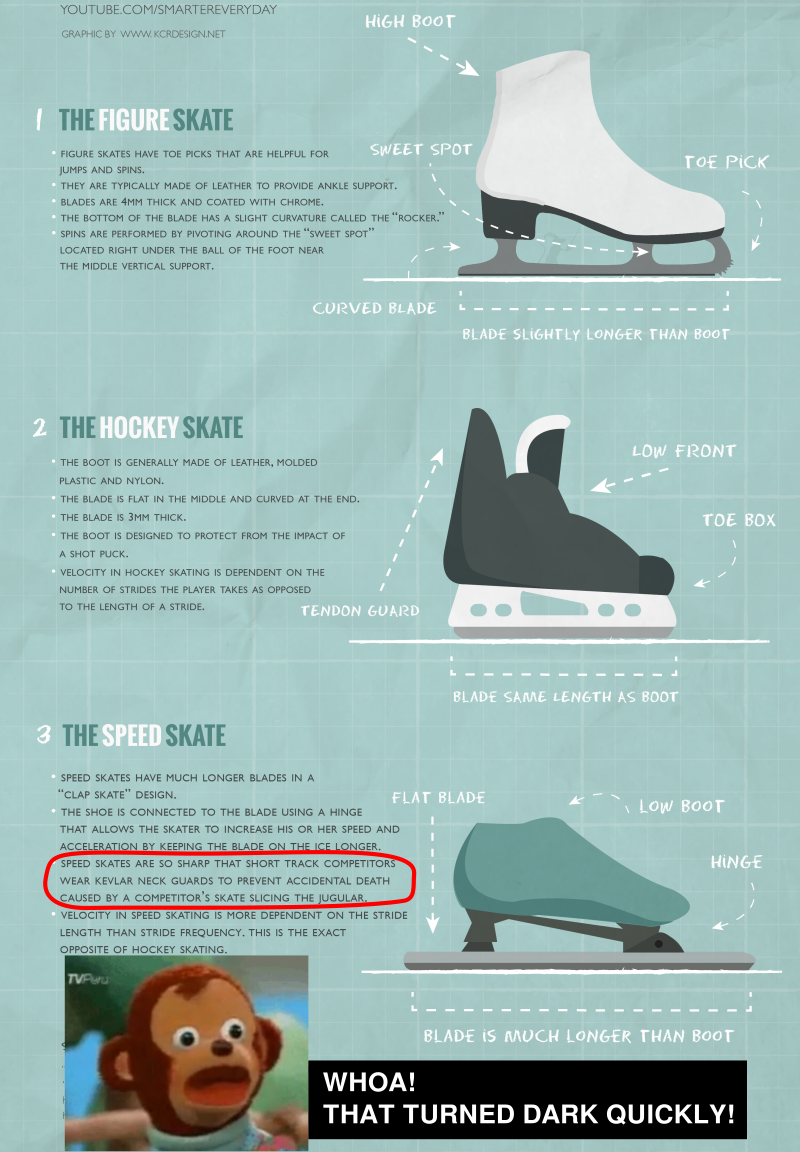
The part I want to focus on is the phrase "speed skates are so sharp". How sharp? Sharp how? Why would they not be sharp? It turns out that steel does pretty well against ice; unfortunately the impurities in the ice are what grinds away your perfect edges. So, for example, when the Zamboni drives across the parking lot to dump the ice it shaves off and later comes back and drives all over the ice tracking dust and abrasive minerals… well, true story.
One of the reasons that I was interested in speed skates is that hockey skates have a complicated edge that you need to take to a hockey shop to get sharpened.
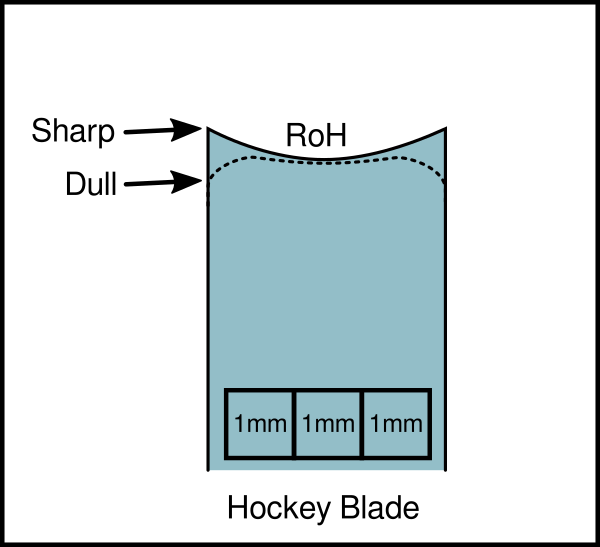
The RoH is the radius of hollow and that curve is carved into the blade’s profile using an expensive specialty grinding machine. Well, you hope it is — it’s actually kind of difficult to audit just how correctly your skates were sharpened. But speed skates are, in some respects, simpler. With speed skates, you can sharpen them yourself! The caveat, of course, is that if you own speed skates, you pretty much must sharpen them yourself.
Ok, no problem. I’m up for that kind of thing. But this is the story of why my skates were too dull to skate on safely for so long and what I finally did about it. First, we need to take a curious diversion to the world of woodworking. You may care about woodworking about as much as speed skating, but bear with me.
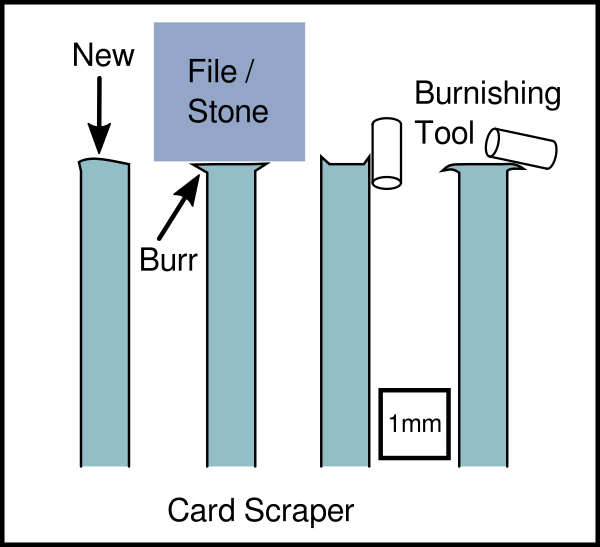
This superb woodworking tool is called a card scraper.
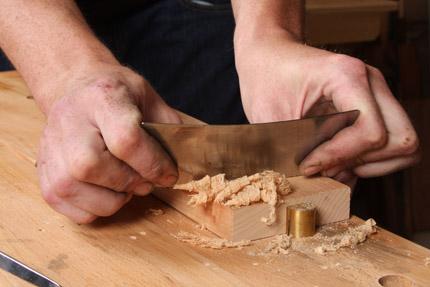
Here it is shown in use doing what it does which is — you guessed it — scraping wood. What’s amazing about this tool is that it’s just a stamped "card" of metal, nothing fancy. And yet it can produce astonishingly smooth finishes. It can shave down unruly wood grain problems as well as do useful tasks like strip old paint. Basically it does much the same thing as sandpaper, only quicker, better, and with no dust.
Sounds awesome, right? Only one tiny problem — you need to sharpen them yourself. You see the theme, right?
In this video, the titan of English woodworking, Paul Sellers, explains all about card scrapers. What I want to focus attention on is the wooden block shown below that he uses to align the scraper for perfect sharpening. I’ve seen enough of his lectures to know that the cut in that block was not made by a band saw with a precision fence. No, it was cut freehand like a freaking ninja with an English rip saw made of Sheffield steel that Paul sharpened personally with a hand file. When this man talks about sharpening things, everyone would do well to take notes! Apparently Paul thinks that a wooden jig can hold a blade in position for accurate sharpening. Good enough for me!
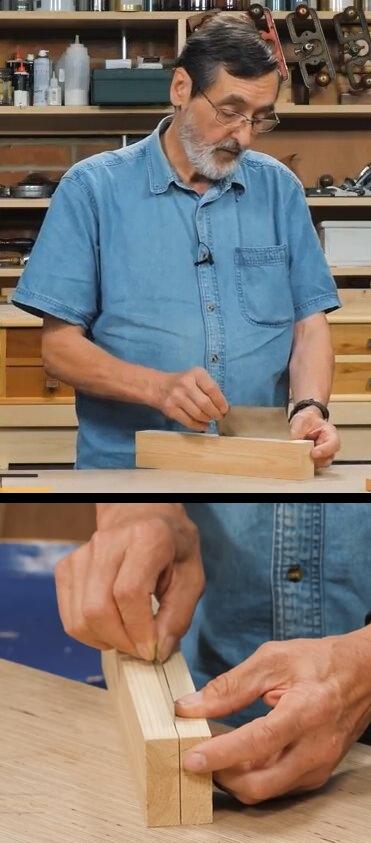
The actual sharpening technique for these scrapers is quite interesting. When they are new from the factory, they are quite useless and have an edge usually straight from the industrial metal shear. The first thing that must be done is the edge must be filed down so that all imperfections are ground out and it is perfectly perpendicular to the sheet. Many people use some kind of guide block, as Paul is demonstrating, to make sure this goes according to that plan. Note that this operation will kick up a burr on the sides. These scrapers are actually made of somewhat soft metal (softer than skate blades) so this burr can be deliberately controlled. Using a very hard burnishing tool or any hardened ground rod the burr is pushed off the end and then pressed down so that the profile resembles a kind of mushroom shape. That is the shape that scoops shavings out of the workpiece.
Ok, great. Back to speed skates — how are they sharpened?
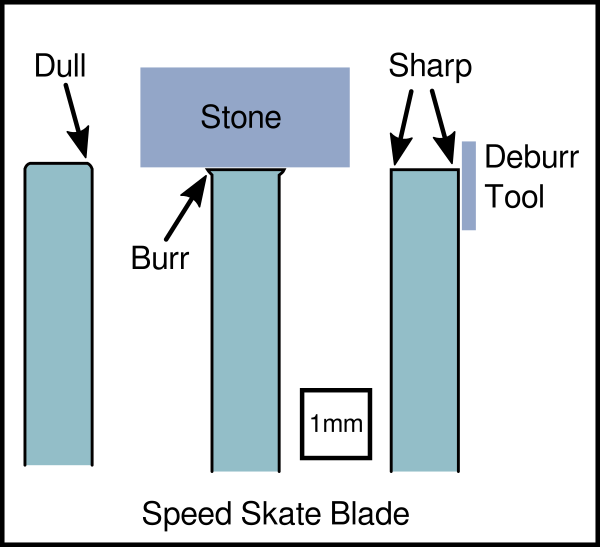
As you can see, the process is quite similar. The main difference is that the end goal isn’t a controlled burr suitable for peeling thin layers of ice. The end goal for speed skates is a perfect ninety degree corner. It turns out that if that corner really is geometrically perfect with no chamfer or bevel, it will be razor sharp and reliably cut into anything softer than the steel such as ice (and jugular veins?) and not slip out of position.
Great, so how does one go about actually doing this on real skates? Normal people — well, "normal" speed skate owners — tend to also own a jig like this.
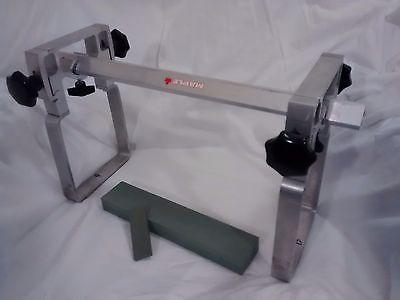
You can see the sharpening stone and the smaller deburring stone. This deburring stone simply pushes off that burr that a card scraper cuts with.
When the skates are loaded in such a jig, it looks a bit like this.
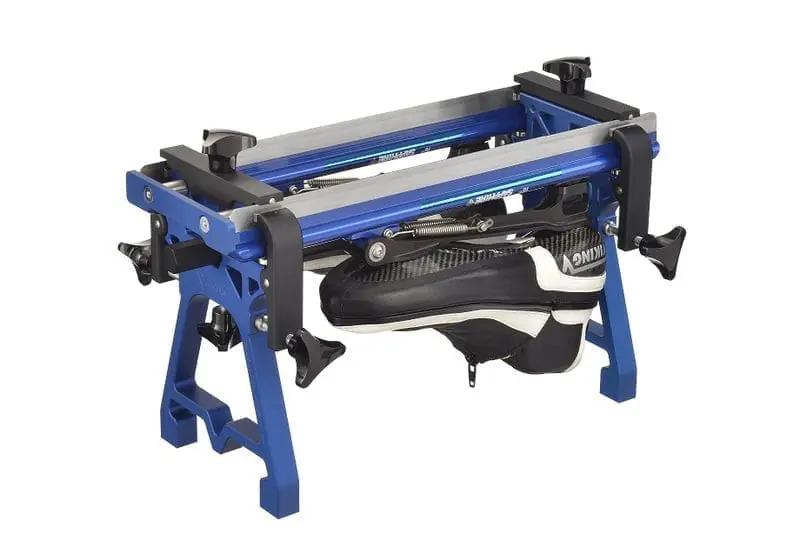
This photo shows a pretty fancy jig and there are black horizontal top stops set in pace to make sure the blades are set at exactly the same height. Once the skates are locked into final position, the stops are removed to facilitate sharpening by moving the stone back and forth over the tops (bottoms really) of the blades.
Of course I am going to be different and weird. And "thrifty" if we lived in a world where my time had no value. I had my typical thought, hmm… I wonder if I can make something myself that works as well or better. Out of junk I have lying around. It seemed like a good project to practice using Blender for design work. Here’s what I came up with.
Remember that time I got all insane about photogrammetry? And if you do, you may have wondered why the heck I didn’t simply pick a better subject! Well, this is why.
I realized that any design like this was going to be surprisingly close. Sure there are easier ways to sort this out, but I wanted to see if Blender could help me solve problems like this.
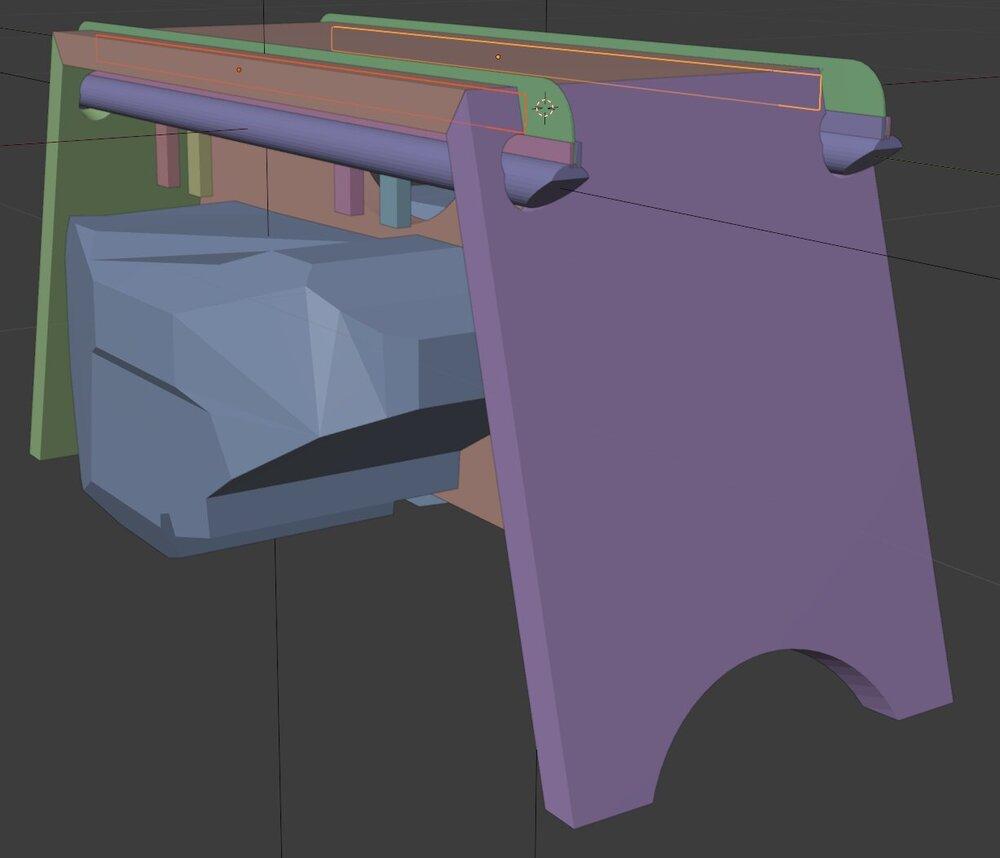
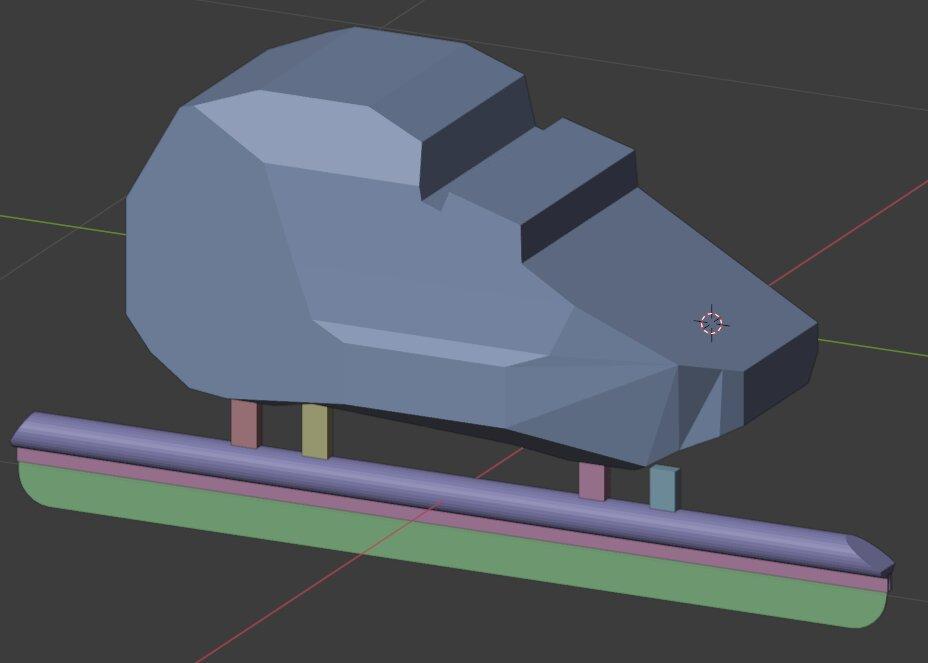
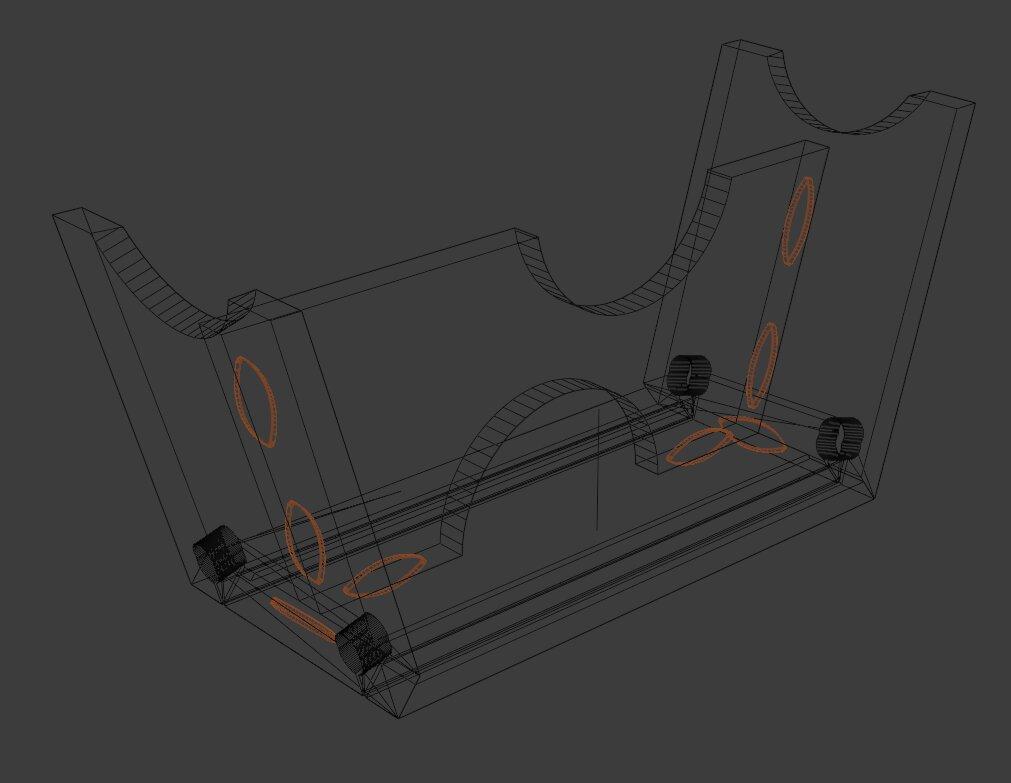
This crude model that I manually hacked out of the default cube is just not accurate enough to answer the questions that need to be answered. Mainly, is there interference with the center support? The closer the skates can be to each other, the better. Too close, however, and the whole thing is useless. Once I replace that with the photogrammetry model, you can see exactly what is going to happen.
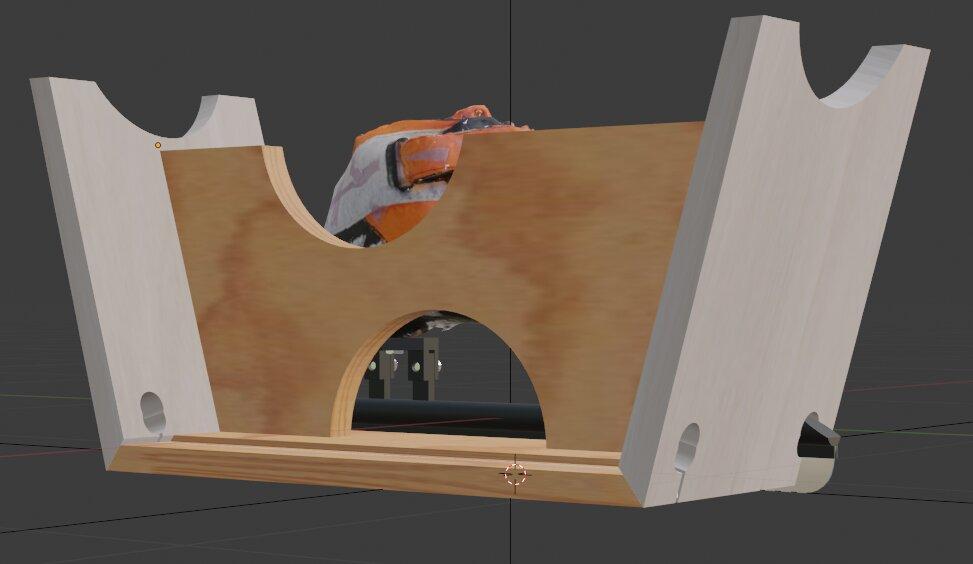
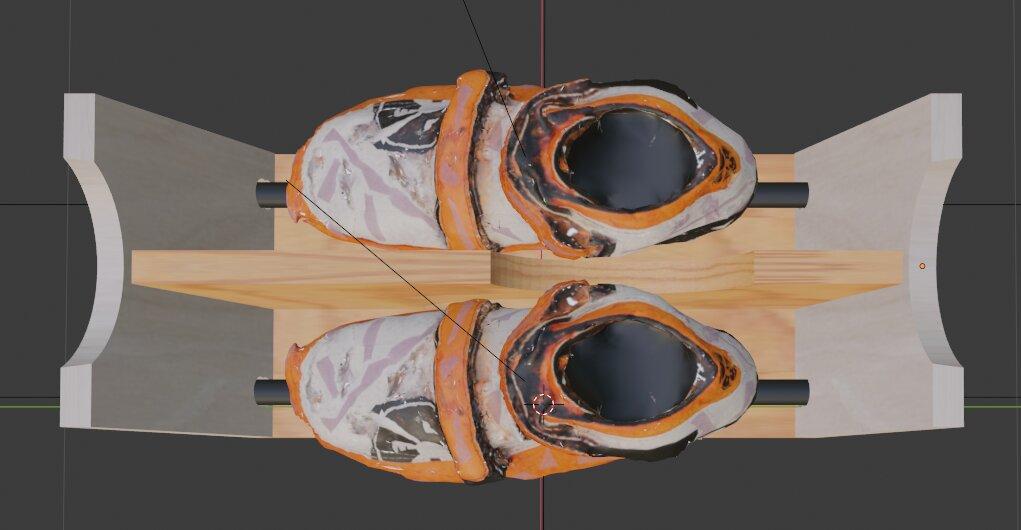
This shows the final setup exactly as I envisioned it. I did realize a bit late that the sides of the top would be precariously attached after the critical slots for the blades were cut. I spent a while thinking about that and finally was able to sink some dowel rod in those sections before making the main cuts.

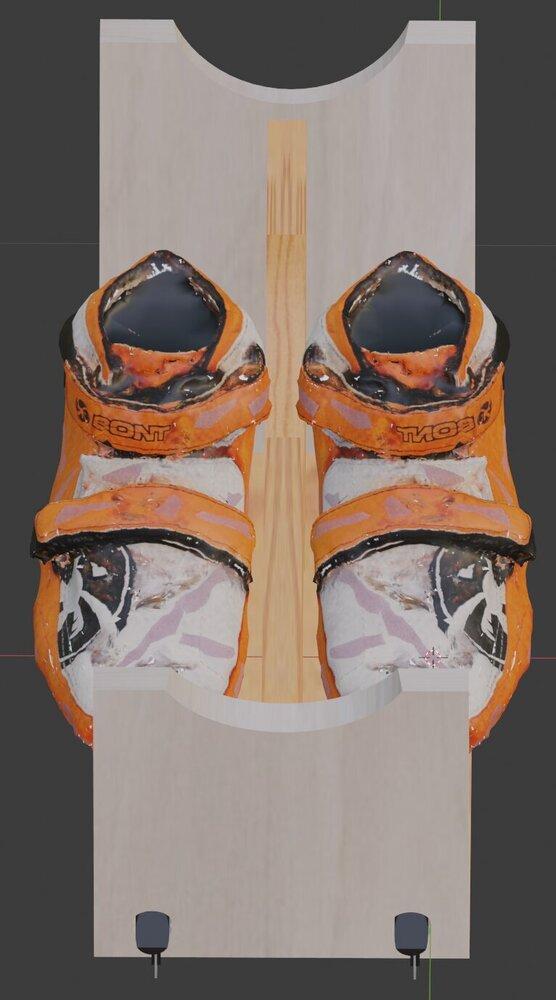
I was very happy that this is actually what the final result did look like!
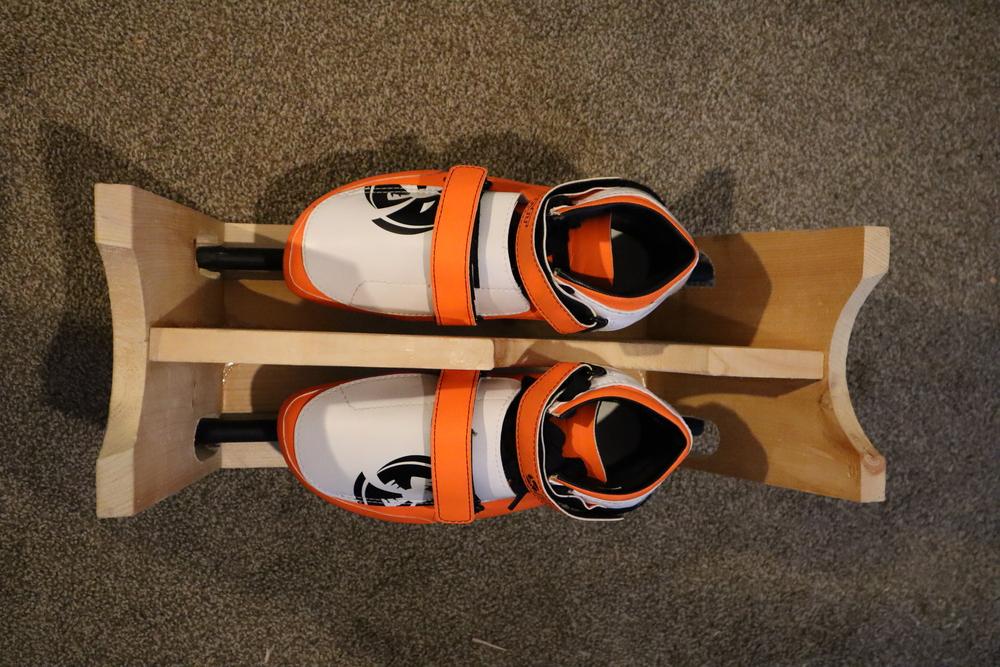
That photo shows the skates just resting loosely not clamped. I was very pleased that when it is clamped, the geometry validates Blender’s ability to be very good at predicting such things.
The clearance holes for the blades are shown as small as possible and I started out with that. I thought they would be sufficient to make the sides quite flexible for clamping, but no, they were impressively stiff. I kept opening those holes until they were exactly the right tension I wanted, just enough to get the skate and reinforcing spacer in perfectly. Very easy to load now too.
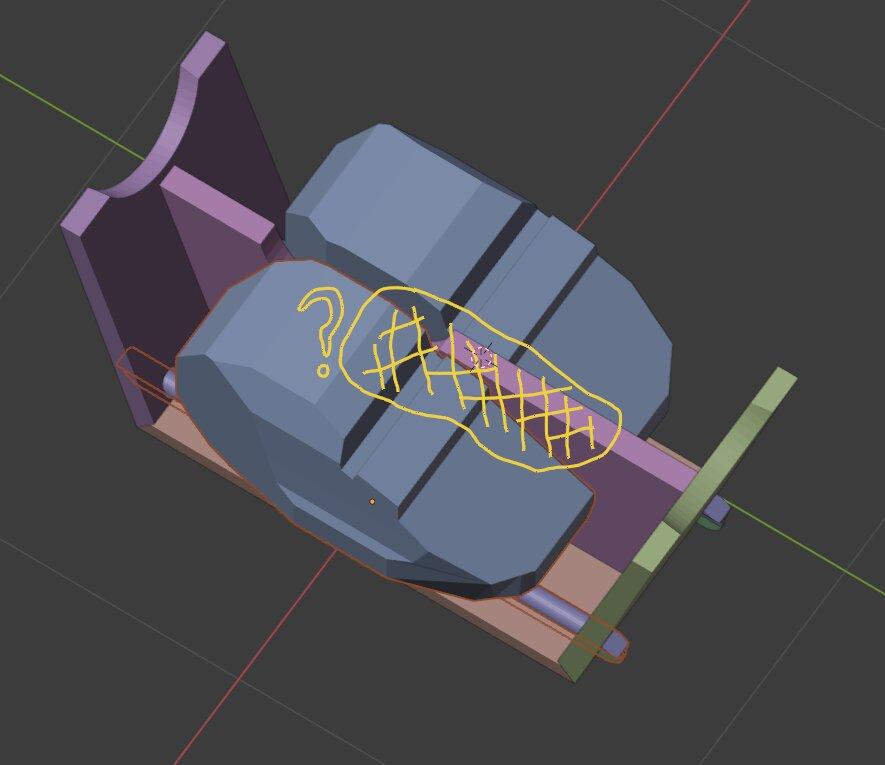
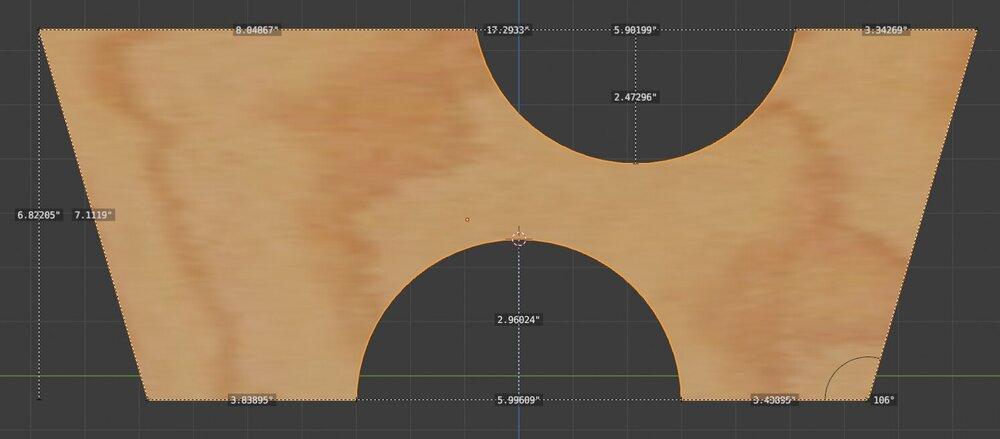
I’m not delighted with Blender’s ability to provide working shop prints, but it can be done. More problematic is Blender’s reluctance to actually tell you detailed high precision measurements that I know it knows. For example, it only measures angles to the nearest whole degree (see lower right); this was insufficient and I ended up calculating them myself using trig.
Of course since I like biscuits there are biscuits all over this thing. I will say though that in terms of execution, this went the most poorly. It can be hard to get a good datum for biscuits in the middle of a board. You must clamp a reference edge and make sure it doesn’t move around. Let’s just say, it moved around more than I would have liked.
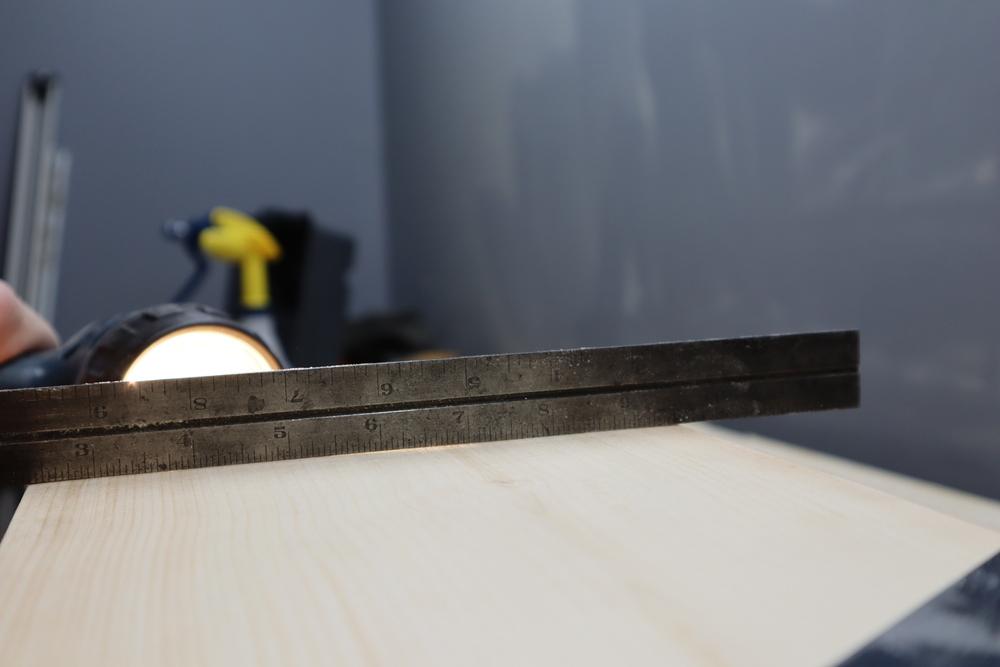
This project would seem to require machine shop accuracy, but that’s mostly not true. However, there is one critical property that must be very accurate: parallelism of the primary blade holding surfaces. My plan for that was to rely on my table saw’s rather good ability to repeat simple cuts. The trick then was to make sure the surface that was against the saw’s table was extremely flat. This would prevent rocking or warping that could cause the cuts to not be parallel.
My technique may seem silly - ok, it was silly - but it worked. I used a test indicator and a surface gauge on my glass table to measure the flatness. Yes, I know it’s not a granite surface plate. I was actually able to pretty reliably map topo contours of exactly what the surface looked like.

How did I cut the top to make it perfectly flat? My card scraper of course! You see the theme, right?
Of course I had to sharpen and burnish the scraper first which I did. With that turtle’s back ready to stand on, I was able to make the top of the skate jig quite flat - more flat than wood can even stay with normal indoor temperature changes. I was then able to make my critical parallel cuts that would support the blades.
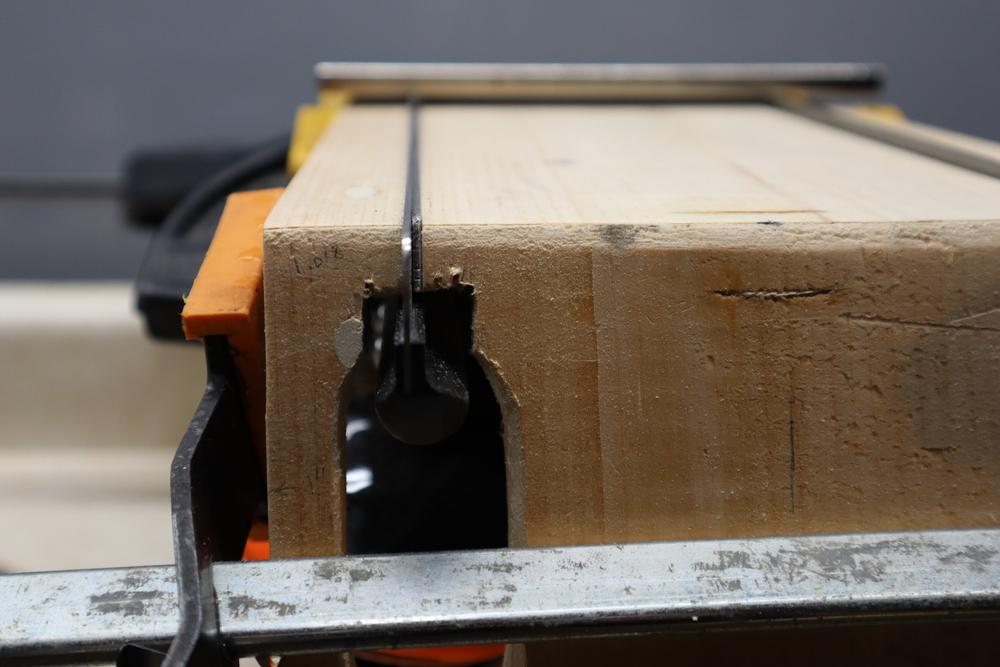
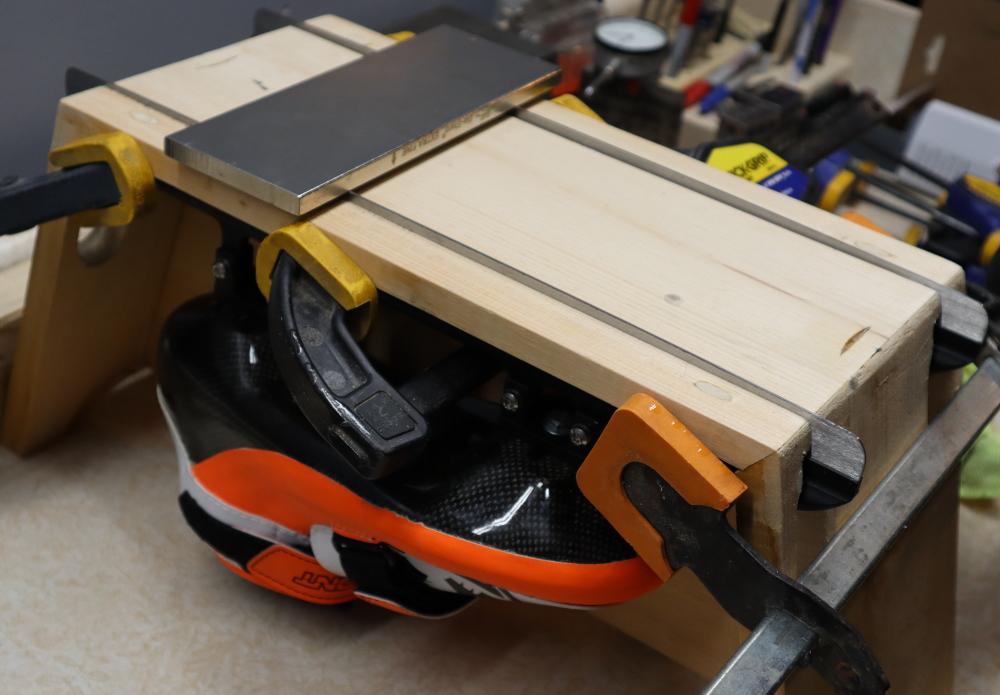
And with those cuts made and the reinforcing shims in place, it all came together and was ready for action. Here’s what it looked like ready to go.

This shows the rough stone I started with and the fine diamond sharpening plate I did finish polishing with. It also shows more clearly how big I had to open the end holes before the wood was flexible enough to have the perfect tension for clamping. The dowel pin is visible too.
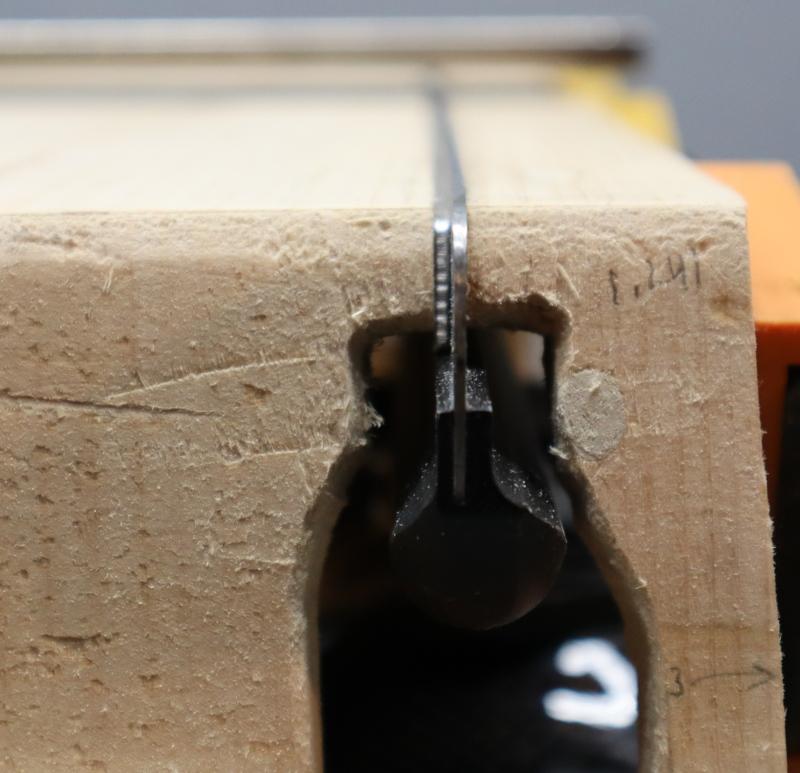
In these shots you can see the serious part of this whole thing. Serious speed skate technicians will look at this contraption and not just be horrified by the ghetto appearance of wood I literally had lying around; they will be horrified that the very premise of this fixture will "ruin" the bend on the blade. It’s actually almost possible to see the blades are straining to curve into a reverse C. Since we’re looking at the front, this means these skates are preset to turn left. Well, serious speed skate technicians, I actually skate clockwise exactly 50% of the time. So the quicker I can ruin this subtle property of the blades, the better! Obviously if you’re a real speed skating person who somehow stumbles upon this, do keep this in mind before following my example.
There are a few decent videos out there of people sharpening skates, but I want to highlight one in particular. I watched this girl sharpen her skates and when she whipped out a bubble level I initially thought, no way is that accurate enough for anything. I think what threw me was she felt she had to go find a place in her house where the floor was level. What she overlooked was that she could simply pack out the jig with card stock (common machinist trick). The idea of using a level, however was actually very smart and correct. When I was aligning my setup I realized that with an accurate level reading consistently across the blades along their lengths, you could pretty much ensure a good result. So if you really want to watch the whole process, check her out.
Ok, I just got back from the ice rink. How did they do?
Well, I was able to skate for about 80 minutes and they were definitely better than the last time I skated. It feels like I didn’t take the burr off completely and got a bit of a card scraper edge. So still not perfect but now that I have a sharpening setup that allows me to try different things, perfection is now a plausible goal.